
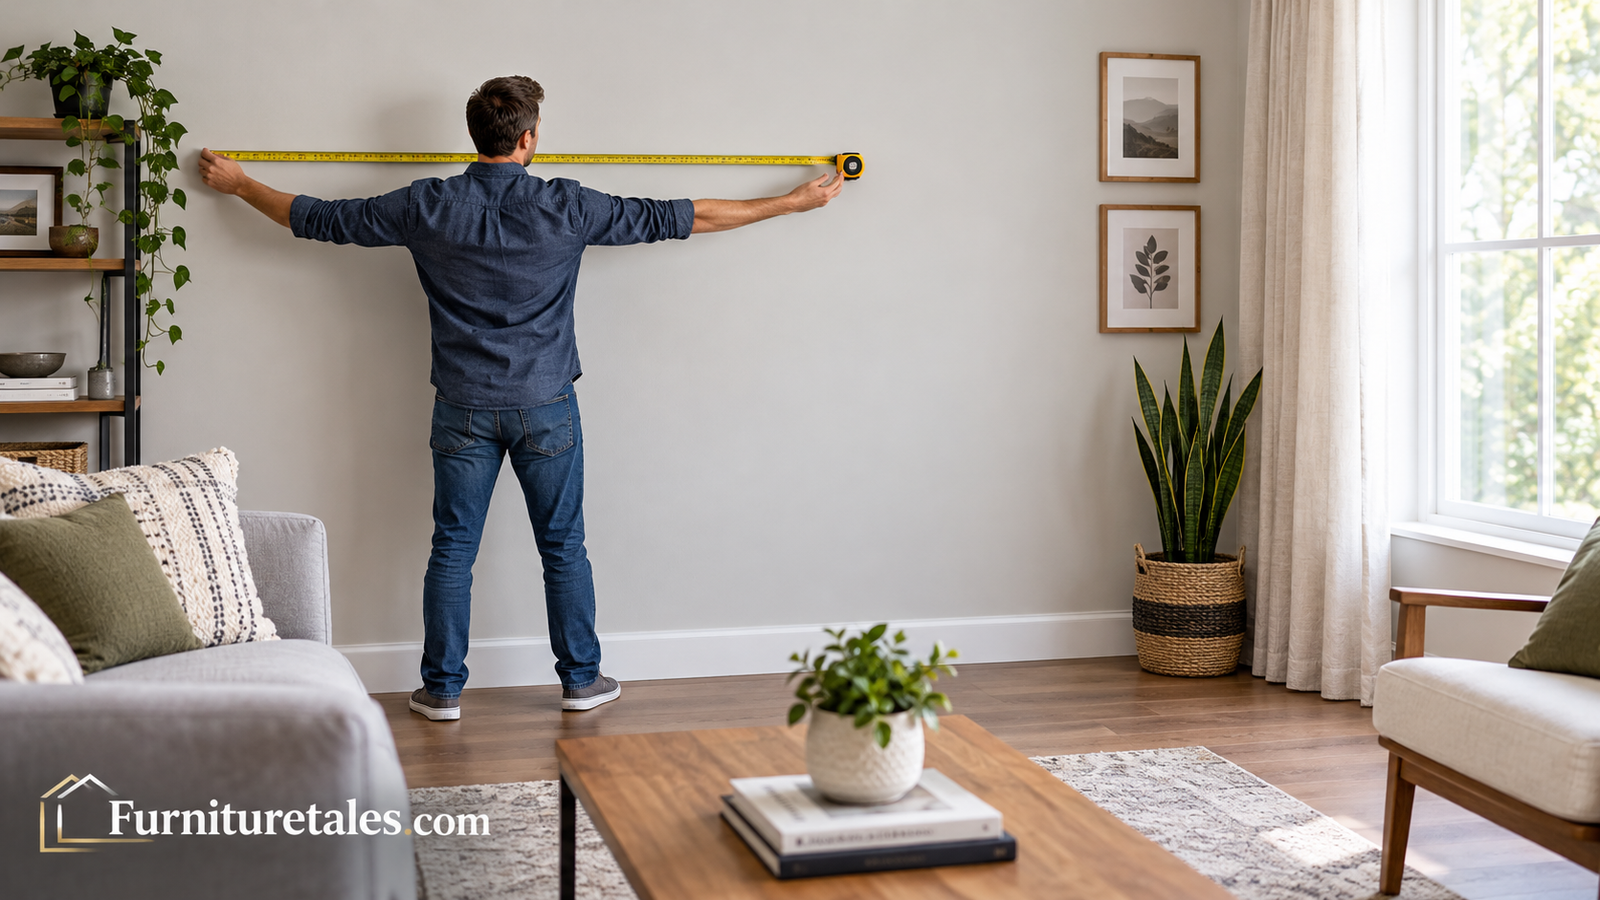
How to Measure Room for Furniture: The Complete Step-by-Step Guide
Learn how to measure a room, doorways, and walkways so every sofa, bed, and table you buy fits the first time, with diagrams, clearance charts, and real-world tips.
1. Why Measuring Before You Buy Matters
Almost everyone has a furniture horror story. A sofa that looked modest in the showroom swallows the living room. A dresser that will not turn the corner on the stairs. A dining table that leaves four inches between the chairs and the wall, so nobody can ever sit down comfortably. These problems share one cause: the person buying never connected the furniture’s dimensions to the real dimensions of the space it had to live in.
Showrooms are deceptive by design. They are enormous, with high ceilings and wide aisles, so everything looks proportionate. Online photos are even trickier because a product photographed on a white background has no sense of scale. When you add the fact that many furniture pieces are returned only with restocking fees, or are simply too heavy and awkward to send back, a mistake can easily cost hundreds of dollars and a lot of frustration.
Knowing how to measure a room for furniture is a skill that pays for itself the very first time you use it. It means you shop with confidence, filter out options that will never work, and focus your energy on pieces that fit both your space and your style. It also helps you plan layouts that feel balanced rather than crowded, because you are working from facts instead of guesses.
What good measuring actually covers
Many people think measuring means writing down the length and width of a room. That is only the beginning. A complete measuring job covers five things:
- The room itself: floor dimensions, ceiling height, and any odd angles or alcoves.
- Fixed obstacles: windows, doors and their swing, radiators, vents, outlets, fireplaces, built-ins, and baseboard heaters.
- Movement space: the walkways and clearances that make a room comfortable to live in.
- The delivery path: every doorway, hallway, staircase, and elevator the furniture has to travel through.
- The furniture: not just the width and depth, but height, arm shape, leg style, and the diagonal depth that matters for tight turns.
Skip any of these and you leave room for a nasty surprise. Do all five and you are practically guaranteed a smooth delivery day.
Timing your purchase
Measuring also gives you a real advantage when sales roll around. If you already know your maximum sofa width and your preferred depth range, you can jump on a deal the moment it appears. If you are still deciding when to shop, our guide on when is the best time to buy furniture explains the seasonal patterns, and having your measurements ready means you can act quickly when prices drop.
Start with the right toolA good tape measure makes every step easier.
Shop Tape Measures on Amazon2. Tools & Prep Work Before You Measure
You do not need a toolbox full of gadgets to measure a room properly. A handful of inexpensive items will give you accurate, repeatable results. Gather everything before you start so you are not hunting for a pencil halfway across the house.
| Tool | What It Does | Why It Helps |
|---|---|---|
| Retractable steel tape (25 ft) | Measures walls, doorways, and furniture | Rigid blade holds its shape across long spans and stays put when you lock it |
| Laser distance measure | Measures a room with a single beam | Fast and accurate for solo measuring, especially in long rooms |
| Painter’s tape | Outlines furniture on the floor | Leaves no residue, so you can test layouts at full size |
| Graph paper & pencil | Sketches a scale floor plan | Squares make scaling simple and errors easy to spot |
| Smartphone notes or camera | Records numbers and photos | Captures angles, outlets, and vents you might forget later |
| Stud finder (optional) | Locates wall studs | Useful if you plan to mount shelves or a TV |
Tape measure versus laser measure
A traditional tape is the most dependable tool because it needs no batteries and works on every surface. Its main drawback is that measuring a long wall alone can be tricky: the end tends to slip, and the blade sags in the middle. A laser measure removes that problem. You place it against one wall, point it at the opposite wall, press a button, and read the distance. Many models also calculate area and store several readings.
If you are only buying one or two pieces of furniture, a tape is plenty. If you are furnishing an entire home, or you often help friends and family with moves, a laser measure is a worthwhile upgrade. Many people keep both: the laser for room dimensions and the tape for furniture and doorways.
Prep the room first
Before you measure, clear the area as much as you can. Move small items away from the walls so the tape can sit flat at the baseboard. Open and close every door to check the swing. Turn on the lights so you can see floor vents, outlets, and cable jacks. Take a few wide photos of each wall, because you will thank yourself later when you try to remember where the cable outlet sat in relation to the window.
Choose your unit and stay consistent
Pick inches and stick with them throughout. Furniture listings in the United States use inches almost universally, so convert any feet-and-inches reading right away. A room that is 12 feet 4 inches long is 148 inches. Writing everything in inches avoids the classic mistake of mixing 12.4 feet with 12 feet 4 inches, which are very different numbers.
Make solo measuring easyLaser measures give fast, accurate room readings.
Browse Laser Measures on Amazon3. Measure the Room’s Length and Width
This is the foundation of everything that follows. You are going to record the floor dimensions of the room, wall to wall, and note any places where the walls are not straight or the room is not a simple rectangle.
Start at one corner, hook the tape end on the baseboard (or on the wall itself if you prefer a consistent reference), and stretch it along the floor to the opposite corner. Read the number and write it down. Then measure the other direction. If the room is a perfect rectangle, those two numbers are all you need. Most real rooms are not perfect, so repeat each measurement in at least two places.
Check for out-of-square walls
Older homes and even some new builds have walls that drift a half inch or more over their length. Measure the length along the front, the middle, and the back, and do the same for the width. Use the smallest number as your working dimension. That way, a sofa chosen to fit the narrowest point will fit everywhere else too.
For a quick squareness check, measure the two diagonals of the room from corner to opposite corner. If the numbers match, the room is close to square. If they differ by more than an inch or so, plan on a bit of extra clearance around anything that sits flush against a wall.
Measure irregular rooms in sections
L-shaped rooms, bay windows, alcoves, and open-plan spaces are best tackled by dividing them into rectangles. Measure each rectangle separately, label it A, B, and C, and note where they connect. Later, when you sketch your floor plan, you can stitch them together on paper. This also makes it easier to decide which zone will hold the sofa, which will hold a desk, and which will stay open for walking.
What to record
- Length and width at two or three points along each wall.
- The diagonal measurements if the room feels slightly skewed.
- Any alcoves, bump-outs, or chimney breasts, with their depth and width.
- The room’s shape, drawn as a quick rough sketch you can label.
Keep your numbers organizedGraph paper makes sketching your room simple.
Find Graph Paper on Amazon4. Measure Ceiling Height and Fixed Features
With the floor dimensions in hand, look up and around. Furniture does not only fill the floor; it also climbs the walls. Tall bookcases, wardrobes, armoires, and canopy beds all need vertical clearance, and windows, radiators, and vents can block an otherwise perfect spot.
Start with ceiling height. Most modern homes have eight-foot ceilings, which equals 96 inches, but variations are common, especially in older houses, attics, and basements. Measure from the floor to the ceiling in the corner where you plan to put your tallest piece. Soffits, beams, and sloped ceilings can lower the usable height, so measure at the exact location.
Windows, doors, and vents
For every window, record the width, the height of the sill from the floor, and the distance from the window edge to the nearest corner. A low sill means you can put a sofa in front without blocking the view; a high sill might let a sideboard slide underneath. For doors, measure the width of the opening, and map the swing so you know whether the door sweeps into the area where you want furniture.
Heating and cooling vents matter more than most people realize. Covering a vent with a heavy sofa reduces airflow, strains your system, and can even damage upholstery. Radiators and baseboard heaters create similar problems, and many manufacturers recommend leaving several inches of space around them. Note each location and its size.
Outlets, switches, and cable points
Mark every outlet, light switch, thermostat, and cable or Ethernet jack on your sketch. A lovely sofa placement means little if it blocks the only outlet on that wall, and a TV stand needs power and cable within reach. Standard outlets sit roughly a foot above the floor, so low-profile furniture can cover them. Use your photos to double-check later.
Fireplaces, built-ins, and architectural features
Fireplaces require safe distances for furniture, so check your local guidance and keep upholstered pieces well clear of the hearth. Built-in shelves, window seats, and columns eat into usable wall space, so measure their width, depth, and projection from the wall. Baseboards and crown molding can add an inch or two that prevents furniture from sitting completely flush, so note their thickness as well.
Need a cleaner layout?Low-profile furniture clears vents and windowsills.
Explore Low-Profile Furniture5. Map Walkways and Traffic Flow
A room is not just a box for furniture. It is a space people move through, and the way they move determines whether it feels welcoming or cramped. This step is where many buyers go wrong, because walkways are invisible until they are blocked.
Walk through the room the way you do on a normal day. Enter through the main door, head to the sofa, cross to the window, step toward the kitchen. Notice the natural lines your feet take. These lines are your traffic paths, and good furniture placement respects them instead of fighting them.
How wide should a walkway be?
As a general guideline, main walkways need about 30 to 36 inches to feel comfortable, while secondary paths, such as the gap beside a bed, can be as narrow as 24 inches. In high-traffic areas, wider is better, particularly if you often carry laundry, groceries, or bags. If anyone in the household uses a wheelchair, walker, or stroller, aim for at least 36 inches throughout and check accessibility guidelines for turning space.
Door swings and drawer clearance
Open each door fully and trace the arc on your sketch. Furniture inside that arc can prevent the door from opening or force you to squeeze through awkwardly. Do the same for closet doors, cabinet doors, and any piece you already own that has doors or drawers. Dressers need roughly 36 inches of space in front so you can pull drawers out fully and stand comfortably; wardrobes and armoires need the full door swing, plus space to stand.
Identify the focal point
Every room has a focal point: a fireplace, a window with a great view, a television, or a bed. Identify yours, and make sure the major seating or the bed relates to it. When you have a clear idea of the paths and the focal point, you can quickly rule out placements that interrupt the flow, saving you the trouble of testing them. For more layout inspiration once your measurements are done, take a look at our guide on how to arrange living room furniture.
- Trace your typical route from each door to each destination.
- Note where two paths cross, because that spot needs extra width.
- Keep pathways free of cords, rugs with curled edges, and low furniture.
Keep paths clear and tidyCord organizers protect walkways from tripping hazards.
Shop Cord Organizers6. Measure the Delivery Path: Doors, Halls, and Stairs
The single most overlooked measuring step is also the one that causes the most dramatic failures. A piece of furniture that fits beautifully in the room is useless if it cannot get there. Every year, countless sofas, wardrobes, and bed frames end up stuck in a stairwell or left on the sidewalk.
Trace the full route from the street (or the elevator) to the final room. Along that route, record the narrowest width, the lowest height, and every turn.
Doorways
Measure the clear opening of each doorway, not the door itself. A standard interior door might be 30 to 32 inches wide, with an actual clear opening an inch or two smaller. Exterior doors are often 36 inches. Removing a door from its hinges can gain you another inch or so, and pulling off stop molding can yield a little more. Measure the height too, although this rarely poses a problem except with tall wardrobes.
Hallways and corners
Hallways are generally 36 to 42 inches wide, which is tight for large pieces. Corners and turns are the real danger because a long item pivoting needs far more space than its width suggests. The key figure is the item’s diagonal depth: if a piece’s depth and height are greater than the corridor’s width at the turn, it may need to be tilted or flipped on end, which can scratch the walls and the furniture.
Stairs and elevators
For stairs, measure the width of the stairwell, the headroom at the lowest point, and the size and shape of any landing. Spiral or narrow staircases may be impossible for large pieces unless they are disassembled or hoisted through a window. In apartment buildings, measure the elevator door and the interior cabin, and ask management about reservations and protective pads.
Think about disassembly
Many modern pieces are designed for this problem. Sofas with removable legs and arms, beds that arrive in flat-pack boxes, and sectionals that break apart all travel more easily. If the delivery path is tight, prioritize these designs. Ask the retailer about the box dimensions as well, since packaging can add several inches.
Once the furniture arrives, furniture sliders for hardwood floors make it much easier to nudge heavy pieces into position without scratching the floor.
Moving something heavy?A furniture dolly makes tight turns much easier.
Browse Furniture Dollies7. Draw a Scale Floor Plan and Tape It Out
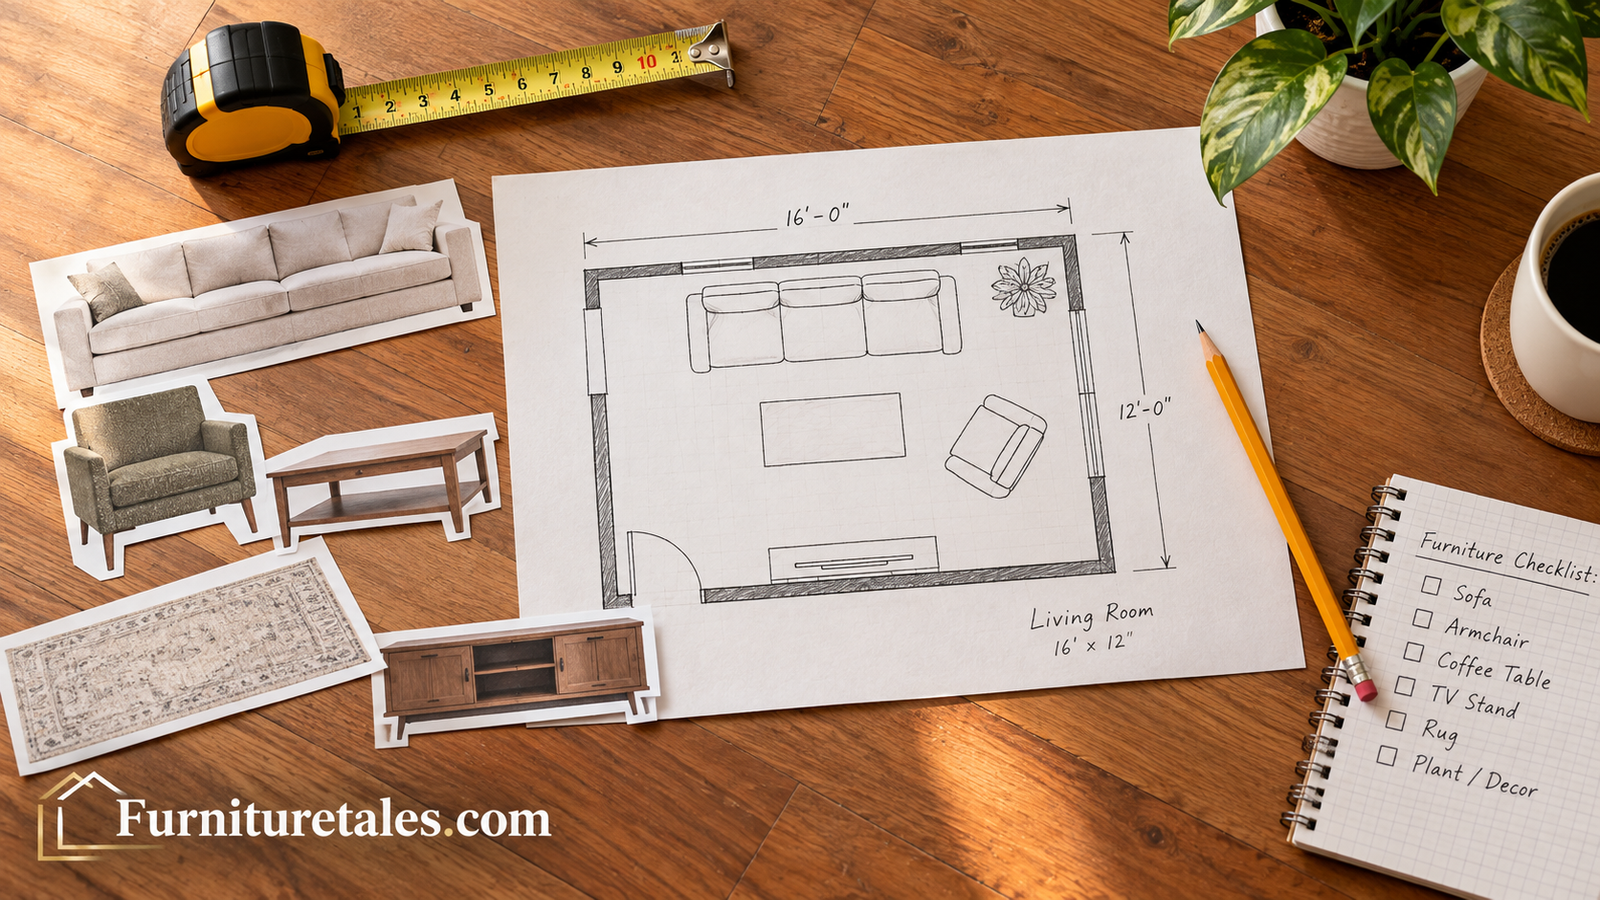
Numbers on a page are helpful, but they only become meaningful when you can see them. Turning your measurements into a scale drawing lets you test layouts on paper, and taping the outlines on the floor lets you feel the space at full size before spending a dime.
Sketch it on graph paper
Choose a simple scale. A common one is one square equals six inches, or one square equals one foot for larger rooms. Draw the room outline first, then add doors with their swing arcs, windows, vents, outlets, and any fixed features. Cut small paper rectangles to scale for each piece of furniture, and slide them around the plan. This approach lets you try ten layouts in ten minutes.
Tape it on the floor
Using painter’s tape, mark the footprint of each major piece in its planned location. A 84-inch sofa becomes a long rectangle on the floor; a coffee table becomes a smaller one nearby. Leave it for a day or two and live with it. Walk around it, sit near it, and carry things past it. You will quickly notice whether the layout feels natural or cramped.
Tape works even better when you also mark the height. Stack boxes or hang paper to the height of a bookcase or headboard, and check sight lines and window coverage. This is the cheapest and most reliable way to catch problems.
Use digital tools if you prefer
Free room-planning apps allow you to draw your space, drop in furniture of any size, and view it in three dimensions. Many retailers also offer augmented-reality features that overlay a piece in your actual room through your phone camera. These tools are fun and sometimes impressively accurate, but they depend on the quality of your input. A sloppy measurement produces a pretty picture of a wrong answer.
Pros of Paper & Tape
- Costs almost nothing
- Gives a true feel for space
- No learning curve
- Easy to share with a partner
Cons of Paper & Tape
- Takes more time to adjust
- No built-in 3D preview
- Tape can lift on some finishes
- Hard to test many styles quickly
Test layouts at full sizePainter’s tape marks the floor without damage.
Get Painter’s Tape on Amazon8. Apply the Furniture Clearance Rules
Designers rely on a set of well-tested spacing guidelines. They are not laws, but they reflect decades of experience about what feels comfortable to the human body. Once you know them, you can look at your floor plan and tell at a glance whether it will work.
Living room and seating
- Coffee table to sofa: 14 to 18 inches, close enough to reach but far enough to walk past.
- Walkways: 30 to 36 inches for main routes.
- Conversation distance: seating groups work best within about 8 to 10 feet so people can talk without raising their voices.
- TV distance: a rough guide is about 1.5 to 2.5 times the screen’s diagonal measurement, depending on resolution and your preference.
- Rugs: at minimum, the front legs of seating should sit on the rug; ideally all legs do.
Dining areas
Allow about 24 inches of table width per person, and keep roughly 36 inches from the table edge to the nearest wall or furniture so chairs can slide out and people can walk behind them. A tighter 32 inches can work in small rooms but feels snug when everyone is seated.
Bedrooms
Plan for 24 to 30 inches on each side of the bed, with 36 inches at the foot if possible. Dressers need roughly 36 inches in front for drawer clearance. A bed pushed into a corner saves room but makes changing sheets harder.
Home office
A desk chair needs about 36 inches behind the desk to roll and turn. Bookshelves need around 24 to 30 inches in front so you can browse them comfortably.
These numbers help you decide on proportions and paint or finishing choices too. If you are updating pieces to suit the space, our guides on the best paint for furniture and finishes can help you tailor what you already own.
Anchor your seating areaThe right rug pulls a layout together.
Shop Area Rugs on Amazon9. Measure the Furniture and Compare It to Your Space
Now you know your room. The last step is to bring the furniture into the equation. Whether you are shopping online, visiting a showroom, or measuring something you already own, treat the dimensions as carefully as you did the room.
The three core dimensions
Furniture is described by width, depth, and height, usually written in that order, though not always. Check which is which in the product description. For a sofa, width is arm to arm, depth is front to back, and height is floor to the top of the back. Always use overall dimensions, since the listed seat measurements often exclude arms or cushions.
Look beyond the headline numbers
- Diagonal depth: helps you judge whether it will fit through tight doors and turns.
- Leg height: exposed legs make a piece feel lighter and let you see more floor, which can make small rooms feel larger.
- Arm shape: wide, rolled arms add inches and reduce usable seating width.
- Reclining clearance: recliners need extra space behind or in front when extended.
- Drawer and door swing: consider the total space needed when they are open.
Compare with the tape test
When you find a candidate, use painter’s tape to outline its footprint in your room, and add cardboard to represent height if you can. Compare the result with your floor plan and delivery path notes. If anything feels tight, it is easier to return to the shopping stage than to return a delivered sofa.
Measure what you already own
Do not forget existing furniture that will remain in the room. A bookcase, console, or armchair you are keeping takes up space and must be included in your floor plan. If you are also freshening existing pieces, you may enjoy our guides on how to paint furniture and how to clean wood furniture.
Shopping for small spaces?Compact designs can solve tight-room headaches.
Find Small-Space Furniture10. Room-by-Room Furniture Size Guide
If you are not sure where to start, the following table offers typical ranges for common furniture. Use it as a reality check against your measurements, then confirm the exact figures with the specific product you like. Sizes vary by brand and style, so treat these as starting points rather than rules.
| Furniture | Typical Size (W × D × H, inches) | Suggested Clearance |
|---|---|---|
| Loveseat | 55–65 × 33–38 × 32–36 | 30 in walkway; 14–18 in to coffee table |
| Standard sofa | 72–96 × 34–40 × 32–36 | 30–36 in walkway; 14–18 in to coffee table |
| Sectional | 100–130 × 60–90 × 32–36 | 36 in around exposed sides |
| Armchair | 30–38 × 32–38 × 32–38 | 24 in minimum; more if it reclines |
| Coffee table | 40–54 × 20–30 × 15–18 | 14–18 in from seating |
| Dining table (4–6 seats) | 48–72 × 30–40 × 29–31 | 36 in from edge to wall |
| Queen bed | 60 × 80 (frame slightly larger) | 24–30 in on each side |
| King bed | 76 × 80 (frame slightly larger) | 24–30 in on each side |
| Dresser | 36–60 × 16–20 × 30–36 | 36 in in front for drawers |
| Desk | 40–60 × 20–30 × 29–30 | 36 in behind for chair |
| Bookcase | 30–36 × 10–14 × 60–84 | 24–30 in in front |
Matching furniture scale to room size
A common rule of thumb is that large furniture should fill roughly 60 to 70 percent of a room’s floor area at most, leaving breathing space. A small room can look sophisticated with a few well-chosen pieces, while a large room often needs some oversized items to avoid feeling empty. If a room feels lifeless, the culprit is often furniture that is too small for the space, not too large.
Think about proportion, not just size
The best-looking rooms balance heights, widths, and visual weight. A low, wide sofa pairs well with a tall lamp or bookcase. A heavy dark wardrobe needs a counterweight elsewhere. When you shop, think about how a piece relates to its neighbors, not simply whether it fits.
Finally, do not forget about upkeep. Whatever you buy, keeping wood and upholstery fresh matters for the long run; a good furniture polish keeps surfaces looking their best between big refreshes.
Protect your investmentQuality polish keeps wood furniture looking new.
Shop Furniture Polish11. Common Measuring Mistakes and How to Avoid Them
Even careful people slip up. These are the errors that show up again and again, along with simple ways to dodge them.
Mistake 1: Forgetting the delivery path
People measure the room beautifully and then discover the sofa will not clear the stair landing. Always measure the route, and remember that turns are harder than straight stretches.
Mistake 2: Ignoring baseboards and trim
Baseboards, crown molding, and window casings can push furniture away from the wall by an inch or more. For a tight fit, measure between the trim, not just wall to wall.
Mistake 3: Measuring only once
A misread tape is surprisingly common. Measure twice, ideally with a second person confirming, and compare the results. If they differ, measure a third time.
Mistake 4: Mixing units
Switching between feet, inches, and centimeters invites arithmetic errors. Convert immediately and keep all numbers in one unit.
Mistake 5: Forgetting about the door swing and drawers
A dresser that fits its spot but blocks the closet door will annoy you daily. Include the full open dimensions of every moving part.
Mistake 6: Trusting the showroom
Showroom sizes fool the eye. A piece that seems modest in a vast store will feel enormous at home. Bring a tape, or better yet, bring your floor plan.
Mistake 7: Overfilling the room
It is tempting to use every square foot, but rooms need breathing space. If your plan leaves less than 30 inches in a main path, consider a smaller piece or fewer items.
Mistake 8: Forgetting about pets and kids
Scratch-prone furniture, play areas, and pet beds all demand space. If you share your home with a cat, see our advice on how to stop cats from scratching furniture before choosing delicate upholstery.
Habits That Prevent Errors
- Write every number down immediately
- Label each measurement clearly
- Photograph tricky areas
- Tape out the footprint first
Habits That Cause Trouble
- Relying on memory
- Measuring in a hurry
- Skipping the delivery route
- Buying from a photo alone
Avoid scratches and dentsProtect floors and furniture during every move.
Shop Furniture Sliders12. Tricky Rooms and Special Situations
Not every space fits the standard approach. Here is how to adapt your measuring when the room, or your circumstances, are unusual.
Small rooms and apartments
In a compact space, every inch counts, so measure precisely and prioritize multipurpose pieces. Choose furniture with exposed legs, since seeing the floor beneath makes a room feel larger. Consider pieces that fold, stack, or double as storage, such as an ottoman with a hidden compartment. Scale down the number of items instead of squeezing in everything, and keep at least a 24-inch path in secondary areas.
Open-plan layouts
Open-plan spaces need zones. Measure each zone separately, and use rugs and furniture backs to define them. A sofa placed with its back to the dining area creates a visual wall, but you must leave a walkway behind it of at least 30 inches. Consider how sound and sight lines travel as well.
Rooms with sloped ceilings or odd angles
Attics and upper-floor rooms often have kneewalls and sloped ceilings. Measure the height at several distances from the wall to find where tall pieces can stand. Low furniture, such as beds and dressers, can sit under the slope, while bookcases and wardrobes need the full-height side.
Rentals
If you rent, measure everything about the building’s access too, since stairwells and elevators might be restricted. Keep your measurements handy for future moves, because the next place will have different dimensions. Choose furniture that is flexible, such as modular sofas and adjustable shelving, which can adapt to different rooms.
Rooms with high traffic or accessibility needs
If anyone in the household uses a mobility device, plan wider paths, usually 36 inches or more, and turning space of around 60 inches. Choose furniture with firm seat heights and sturdy arms. Remove or secure loose rugs that could snag wheels.
Furnishing multiple rooms at once
When you are furnishing an entire home, create a master document with every room’s dimensions, fixed features, and delivery route. Use a consistent format so you can compare rooms quickly. Photograph each wall and keep the photos next to the numbers. When you buy something, add its dimensions to the same file so you can see how the pieces relate.
Updating furniture you already own
Sometimes the best solution is not buying new. If a piece fits your room’s proportions but not its style, a fresh finish can work wonders. Our guide on how to paint IKEA furniture shows how to update flat-pack pieces without losing their practical dimensions.
Ready to shop with confidence?Find furniture sized to match your measurements.
Browse Modular SofasFrequently Asked Questions
How do I measure a room for furniture?
Measure the length and width of the room wall to wall, then record the ceiling height, window and door positions, vents, and outlets. Add the walkways you want to keep clear, then compare the remaining space to the furniture’s dimensions. Finish by measuring the delivery path so the piece can actually reach the room.
What tools do I need to measure a room?
A 25-foot retractable tape measure, a pencil, graph paper, and painter’s tape cover nearly every need. A laser distance measure is a helpful extra for long rooms or when you are measuring alone. A smartphone for photos and notes rounds out the kit.
How much space should I leave around furniture?
Aim for 30 to 36 inches for main walkways, 14 to 18 inches between a sofa and coffee table, 24 to 30 inches on the sides of a bed, and about 36 inches behind dining chairs. Tighter clearances can work in small rooms, but the space will feel more cramped.
How do I know if a sofa will fit through my door?
Measure the clear width and height of every doorway along the route, then compare them with the sofa’s depth, height, and diagonal depth. Remember that turning a corner requires more space than going straight. Removing the door from its hinges and detaching the sofa legs can gain a few valuable inches.
Should I measure in inches or feet?
Inches are best because furniture is nearly always listed in inches. Convert feet and inches immediately, so 10 feet 6 inches becomes 126 inches. This avoids confusion when you compare your numbers with product dimensions.
How do I measure an L-shaped or irregular room?
Break the room into rectangles, measure each one separately, and label them on a sketch. Note where they connect and how wide the opening is. Then combine them on a scale floor plan so you can see how furniture can bridge the zones.
Do I need to measure ceiling height?
Yes, especially for tall pieces such as bookcases, wardrobes, and canopy beds. Standard ceilings are often about 96 inches, but older homes, attics, and basements vary. Check for beams, fans, and light fixtures that reduce the real clearance.
What is the best way to visualize furniture before buying?
Outline the footprint with painter’s tape on the floor and live with it for a day or two. Stack boxes or hang paper to represent height. You can also use room-planning apps or augmented-reality tools, but check their accuracy against real measurements.
How big should a rug be compared with the furniture?
The rug should be large enough for at least the front legs of your seating to rest on it, and ideally all legs. In a dining room, the rug should extend at least 24 inches beyond the table edge so chairs stay on it when pulled out.
How can I make a small room feel bigger with furniture?
Choose pieces with exposed legs, lighter colors, and slim profiles. Use multipurpose furniture, keep walkways clear, and avoid pushing every piece against the walls if it blocks natural movement. Mirrors and good lighting also help, but accurate measuring remains the most important step.
Should I measure again before delivery day?
Yes. A quick re-check of the doorway, hallway, and final placement spot prevents surprises. Clear the path of rugs, décor, and small furniture, and protect floors and walls before the delivery crew arrives.
What if the furniture does not fit after it arrives?
Check the retailer’s return or exchange policy right away, and keep all packaging if possible. Some retailers charge fees, so read the terms before you buy. If the piece fits the room but not the path, ask whether it can be disassembled or whether specialty delivery is available.
Conclusion: Measure Once, Buy Confidently
Learning how to measure a room for furniture is one of the most valuable habits any homeowner or renter can build. It does not require special training or expensive equipment, just a tape measure, a notebook, and a little patience. When you measure the room, the fixed features, the walkways, the delivery path, and the furniture itself, you replace guesswork with knowledge.
Remember the sequence: measure length and width, check ceiling height and fixed features, map your walkways, trace the delivery route, draw a scale plan, apply clearance rules, and compare against the actual furniture. Tape out your favorites on the floor, take photos, and keep your numbers in an easy-to-find place. Those few extra minutes will protect you from returns, scratched walls, and the frustration of a beautiful piece that simply does not fit.
Most of all, a well-measured room gives you freedom. When you know your limits, you can shop creatively, take advantage of sales, and choose pieces that truly suit your life. Happy measuring, and enjoy the space you create.
Ready to get started?Gather your measuring tools and shop furniture that fits.
Shop Measuring Tools on Amazon