

How to Paint IKEA Furniture: A Complete Guide to a Finish That Actually Lasts
Laminate, particleboard, and foil-wrapped panels can look stunning in a new color, but only if you prep them the right way. Here is the full method, step by step.
Almost everyone who owns IKEA furniture eventually has the same thought: the shape is perfect, the price was right, but the color is not quite what you want anymore. Maybe the white has yellowed, the birch-effect finish feels dated, or you simply want a deep green bookcase that no store sells. Painting is the most affordable way to get exactly the piece you imagined, and it can turn a basic flat-pack unit into something that looks custom-made.
The catch is that IKEA pieces are not built like old solid-wood dressers. Most are made from particleboard or fiberboard wrapped in a smooth, glossy surface. Paint applied straight onto that surface will bead up, peel, or scratch off with a fingernail. The good news is that the problem is entirely solvable. With the right cleaner, a light scuff, a proper bonding primer, and patience between coats, you can get a finish that stands up to daily life for years.
This guide walks through the whole process from start to finish. You will learn how to identify what your piece is made of, which supplies are worth buying, how to paint with a brush and roller or with a spray, how to handle hardware and drawers, and how to fix problems when they show up. If you have never painted furniture before, you will find every step explained in plain language, with a diagram for each one.
1. Why Painting IKEA Furniture Is Different From Painting Other Furniture
If you have refinished a vintage oak table before, forget most of what you know. Solid wood is porous. It drinks in stain, grips primer, and tolerates aggressive sanding. IKEA furniture is engineered for a different purpose: to be light, affordable, and easy to ship. That engineering is the reason it needs a different painting approach.
Most IKEA cabinets, shelves, and dressers are built from a core of particleboard or fiberboard. That core is covered with one of several surface layers, including melamine, paper foil, plastic laminate, or a thin wood veneer. These coverings are designed to resist stains and wear, which is great for daily use and terrible for paint adhesion. Paint simply has nothing to grab onto.
There is a second challenge. The core underneath is made of compressed wood fibers and glue. If it gets soaked, it swells and crumbles. If you sand through the surface layer, the core is exposed and can absorb paint unevenly or swell with moisture. That means you need a gentle touch with sanding and with liquid cleaners, and you want to avoid saturating edges and joints.
What Actually Makes Paint Stick
Adhesion on a slick surface comes down to three things working together: a clean surface, a slightly roughened surface, and a primer that is chemically designed to bond to glossy materials. Skip any one of them and you are gambling. Do all three and the paint behaves almost like it would on real wood.
Is It Worth Painting IKEA Furniture at All?
Absolutely, for the right pieces. A painted bookcase, dresser, or cabinet in a custom color can look far more expensive than it was. It also lets you match furniture to a room you have already decorated, instead of building the room around the furniture. Painting also extends the life of pieces that are structurally fine but visually tired.
Pros of painting IKEA furniture
- Unlimited color choices at a low cost
- Makes basic pieces look custom
- Extends the life of worn but sturdy furniture
- Keeps furniture out of the landfill
- Works on most flat surfaces with the right prep
Cons to keep in mind
- Needs patient prep and cure time
- Heavy-use surfaces can chip if rushed
- Textured foil is harder to hide
- Not ideal for damp bathrooms or outdoor use
If you are still deciding whether to repaint your current piece or replace it, it can help to know when furniture goes on sale. Our guide on the best time to buy furniture covers the calendar so you can compare the cost of a new piece against the cost of a weekend of painting.
Browse bonding primers designed for laminate and glossy furniture.
2. Know Your Surface: Identify What Your IKEA Piece Is Made Of
Before you buy a single can of paint, work out what the outside of your furniture is made of. The surface decides how much you need to sand, which primer works best, and how forgiving the project will be. IKEA uses many materials across its ranges, and two pieces that look alike can behave very differently.
A Quick Identification Test
Look closely at an unfinished edge, such as the back of a shelf or the inside of a drawer. If you see tiny wood chips pressed together, the core is particleboard. If it looks like dense, smooth cardboard-colored material, it is fiberboard. Now run a fingernail across a hidden spot on the visible surface. Wood grain texture you can feel suggests foil or veneer. A perfectly smooth, plastic feel suggests melamine or laminate. If you see a real wood grain pattern that continues over the edge with a visible seam, it may be solid pine or veneer.
| Surface type | How it feels | Paint difficulty | Best approach |
|---|---|---|---|
| Melamine or laminate | Smooth, slightly glossy, plastic-like | Moderate | Degrease, scuff lightly, bonding primer |
| Paper or plastic foil | Printed woodgrain, sometimes textured | Moderate to hard | Gentle scuff, bonding primer, thin coats |
| Wood veneer | Thin real wood, light grain | Easier | Light sand, primer, avoid sanding through |
| Solid pine | Soft, visible grain, dents easily | Easiest | Sand, wood primer, any good paint |
| Lacquered or painted MDF | Very smooth, factory paint | Moderate | Clean, scuff, bonding primer |
| Plastic or glass parts | Hard, non-porous | Hard | Usually remove or mask, do not paint |
When to Skip the Project
Some pieces are poor candidates. Items that sit in constantly wet places, pieces with heavily swollen or crumbling edges, and surfaces with deep textured embossing are tough to paint well. Heavily used worktops, such as kitchen counters, take a beating that most furniture paint will not survive. If a surface is peeling, bubbling, or soft to the touch, repair it first or choose a different project.
It is also wise to test any questionable surface in a hidden spot. A small patch on the back panel tells you more than any guess. Clean it, scuff it, prime it, paint it, and let it cure for a few days. If a fingernail cannot scrape it off, you are in good shape.
Knowing the dimensions of the piece also matters, especially if the new color will change how it sits in the room. If you are planning to move things around, the walkthrough on measuring a room for furniture is a useful companion before you commit to a bold shade.
Pick up small sample-size supplies to try before you commit.
3. Tools and Materials: Everything You Need Before You Start
Good furniture painting is mostly about being organized. Nothing ruins a coat of paint like stopping halfway to hunt for a tack cloth. Gather everything first, lay it out, and you will work more calmly and get better results.
The Core Supply List
- Degreasing cleaner: A household degreaser, a TSP substitute, or a mild dish soap solution to remove oils, polish, and kitchen film.
- Sanding sponge or paper: Fine grit in the 180 to 220 range for scuffing glossy surfaces.
- Bonding primer: A primer made for slick surfaces, either water-based or shellac-based.
- Furniture paint: Acrylic enamel, cabinet paint, or a high-quality water-based paint with a durable finish.
- Topcoat: A water-based polyurethane or acrylic clear coat for high-wear areas.
- Foam roller and angled brush: Small foam rollers leave the smoothest finish. A good angled brush handles edges and corners.
- Painter’s tape and drop cloth: To protect floors, mask hardware openings, and keep clean lines.
- Tack cloth or microfiber cloths: To remove every trace of sanding dust.
- Screwdriver or hex key: For disassembly, plus small bags and a marker for labeling hardware.
Nice-to-Have Extras
Sawhorses make a huge difference because they let you paint flat panels horizontally, which reduces drips. Painter’s pyramids, small plastic cones that lift the piece off the surface, let you paint edges without gluing the panel to your workspace. A respirator or at least a good dust mask is worth having when sanding or spraying. Wood filler helps with chips and dings, and a small paint cup with a liner makes cleanup simple.
| Item | Why it matters | Budget level |
|---|---|---|
| Foam mini roller (4 inch) | Smooth finish with fewer brush marks | Low |
| Bonding primer | Holds paint to glossy surfaces | Medium |
| Sanding sponge (fine) | Gentle scuffing without cutting through | Low |
| Painter’s pyramids | Lets you paint all edges cleanly | Low |
| Water-based polyurethane | Protects high-wear surfaces | Medium |
| Spray gun or paint sprayer | Ultra-smooth results on larger projects | Higher |
Do not skimp on the primer or the rollers. Cheap rollers shed fuzz into your paint, and a weak primer is the most common reason a finish fails. Spend a little more on those two items and you will feel the difference in the result.
Foam rollers, sanding sponges, and tack cloths in one place.
4. Choosing the Right Paint and Primer for IKEA Furniture
The paint aisle is overwhelming, but the decision gets much simpler once you understand what each type does. For IKEA furniture, you want a primer that bonds to slick surfaces and a paint that cures hard. Everything else is detail.
Primer Options Compared
| Primer type | Strengths | Drawbacks | Best for |
|---|---|---|---|
| Water-based bonding primer | Low odor, easy cleanup, strong grip | Slightly longer cure time | Most indoor projects |
| Shellac-based primer | Excellent adhesion, blocks stains fast | Strong odor, needs ventilation | Tough foil and stained pieces |
| Oil-based primer | Very durable, smooth sanding | Slow dry, strong fumes | Experienced painters |
| Standard wall primer | Cheap and easy to find | Poor grip on laminate | Not recommended here |
For most people, a water-based bonding primer is the best balance of performance and convenience. Shellac-based primers have a reputation for sticking to almost anything, and they are worth using on stubborn pieces, but they require ventilation and a bit more caution. Avoid ordinary wall primers on laminate. They look fine for a week and then peel off in sheets.
Paint Options Compared
| Paint type | Finish | Durability | Notes |
|---|---|---|---|
| Acrylic enamel | Satin to gloss | High | Self-leveling, very popular choice |
| Cabinet and trim paint | Satin or semi-gloss | High | Designed for hard-wearing surfaces |
| Chalk-style paint | Flat, matte | Medium with wax or topcoat | Easy to use but needs a sealer |
| Milk paint | Matte, rustic | Varies | Needs bonding agent on laminate |
| Regular wall paint | Flat to eggshell | Low | Tends to scuff and stay tacky |
Acrylic enamel and dedicated cabinet paint are the strongest all-around options. They flow out smoothly, dry hard, and resist the scuffs that come with daily use. Chalk-style paints are friendly and forgiving, but they are soft until sealed, so plan to add a protective topcoat. If you want to compare specific products, we have a dedicated roundup of the best paint for furniture that goes into more detail on brands and finishes.
Sheen: Matte, Satin, or Gloss?
Sheen changes both the look and the wear. Matte hides imperfections but marks easily. Satin is the sweet spot for most furniture, with a soft glow and good washability. Semi-gloss and gloss show every flaw in the surface but wipe clean easily, which makes them a great choice for kitchen cabinets and kids’ furniture. If your piece has any texture or dings, lean toward satin or matte.
For a broader look at technique that applies to any furniture type, our walkthrough on how to paint furniture covers general principles, which pair nicely with the IKEA-specific steps below.
Compare acrylic enamel and cabinet paints rated for furniture.
5. Prep Work: Steps 1 to 3 (Set Up, Clean, and Scuff)
Prep is where finishes are won or lost. It is also the least glamorous part of the job, so it is the part most people rush. Give these three steps your full attention and the painting itself will feel easy.
STEP 1Set Up Your Workspace and Disassemble
Choose a well-ventilated space with good light, such as a garage, a covered patio, or a spare room with the windows open. Lay a drop cloth over the floor and set up two sawhorses or sturdy supports. Temperature matters too. Most water-based paints cure best between about 60 and 80 degrees Fahrenheit with moderate humidity.
Next, take the piece apart as far as is practical. Remove drawers, doors, shelves, knobs, handles, and hinges. If the furniture is glued or cam-locked and will not come apart without damage, leave the frame assembled and mask the parts you cannot remove. Place all screws and hardware in labeled bags so reassembly takes minutes instead of an afternoon of guessing.
STEP 2Clean and Degrease Every Surface
Even furniture that looks spotless carries a thin layer of oil, dust, polish residue, and cooking film. Paint will not grip over any of it. Mix your degreaser according to the label, dampen a sponge or cloth, and wipe every surface in overlapping passes. Be gentle with the amount of liquid. Particleboard edges absorb water quickly, so wring out your cloth well and wipe dry with a second cloth right away.
Pay special attention to areas that get touched most: drawer fronts, door edges, and the top surface. Kitchen furniture needs an extra pass because cooking oil creates an invisible film that quietly ruins adhesion. Rinse with a barely damp cloth to remove cleaner residue, and let the piece dry fully before moving on. If your piece is real wood or has an older finish, our guide on how to clean wood furniture has additional tips for stubborn grime.
STEP 3Scuff Sand the Surface
Scuff sanding means roughening the glossy layer just enough for primer to bite, not removing it. Use a fine sanding sponge or 180 to 220 grit paper and work with light, even pressure. You are aiming to dull the shine across the entire surface. When you finish, the piece should look matte and feel slightly velvety rather than slick.
Go carefully on edges and corners, where the thin surface layer wears through quickly. If you do expose the particleboard core, stop sanding that spot and seal it with primer. Never press hard. After sanding, wipe off every speck of dust with a tack cloth or a slightly damp microfiber cloth, then let the surface dry. Dust left behind becomes tiny bumps in the finished paint.
Degreasers, fine sanding sponges, and tack cloths for flawless prep.
6. Prime, Paint, and Protect: Steps 4 to 6
With prep done, the satisfying part begins. This is where the color appears, and where patience pays off the most. The golden rule is thin coats. Several thin, even coats always beat one thick coat, which sags, drips, and stays soft for weeks.
STEP 4Apply Bonding Primer
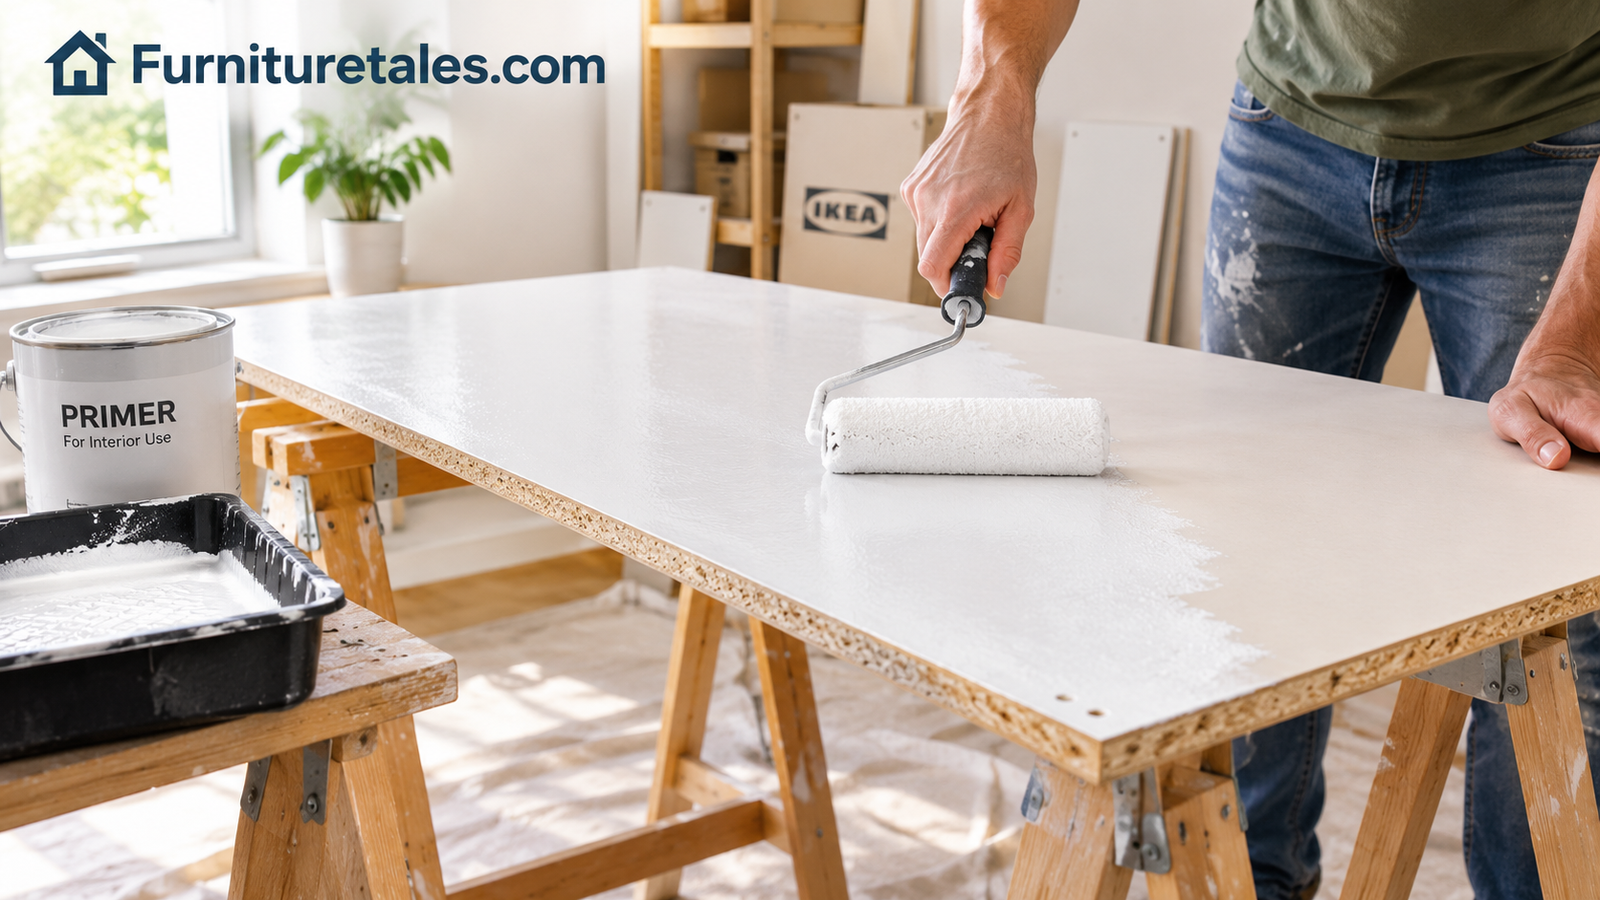
Stir the primer thoroughly rather than shaking it, to avoid bubbles. Use a small foam roller for flat areas and an angled brush for corners and edges. Roll in long, light strokes and work in one direction. Aim for a thin, even coat with no puddles. The primer should look uniformly white or gray, but it does not need to hide everything in one pass.
Follow the label for drying time before the next step, and do not rush it. If the primer feels tacky, wait longer. Lightly sand with a very fine paper after the primer is dry if you feel any roughness, then wipe off the dust. On very dark or boldly patterned pieces, a second thin coat of primer will help your final color look true.
STEP 5Paint in Thin, Even Coats
Start with an angled brush on edges, corners, and detailed areas, then immediately follow with the roller on the flat areas while the brushed paint is still wet. This keeps the finish seamless and prevents visible lap marks. Roll lightly and avoid going back over areas that have started to dry. Fiddling with partly dry paint is the number one cause of streaks.
Allow the recommended recoat time between layers, which is usually a few hours for water-based paints. Most pieces need two coats, and darker or lighter shifts may need three. Between coats, a very light pass with fine sandpaper knocks down dust nibs and gives you a silky feel. Wipe clean each time. Always paint the underside and inside surfaces too if they will be visible, and flip panels carefully only when the first side is dry enough to handle.
STEP 6Seal With a Topcoat and Let It Cure
A clear water-based polyurethane or acrylic topcoat adds a layer of protection that makes a big difference on tabletops, dresser tops, and drawer fronts. Apply it in thin coats with a clean foam brush or roller, following the product directions. Some modern enamel paints are durable enough on their own for low-use pieces, but a topcoat is cheap insurance on anything that gets touched daily.
Then comes the hard part: waiting. Paint feels dry long before it is cured. Dry means it is safe to touch. Cured means it has hardened fully, and that can take days to a few weeks depending on the product. During that time, be gentle. Avoid heavy objects, sliding items across the surface, and any wet cleaning. Letting the piece cure fully before reassembling and loading it is the secret to a finish that does not chip.
Water-based polyurethane and clear acrylic topcoats for painted furniture.
7. The Spray Method: A Smoother Alternative to Brush and Roller
If you want the closest thing to a factory finish, spraying is hard to beat. A sprayer lays down paint with no brush marks or roller texture, which is especially nice on flat IKEA fronts. It also reaches grooves and edges easily. The prep steps are identical, and so are the primer and topcoat principles. What changes is how the paint goes on.
You have two main spray options: aerosol cans and a handheld paint sprayer. Cans are convenient and good for small projects like a side table or a few drawer fronts. A paint sprayer is more economical for larger jobs and gives you more control, though it takes a bit of practice and cleanup. In either case, work outdoors or in a space with strong ventilation and wear a respirator.
SPRAY 1Test, Shake, and Set the Distance
Practice on a piece of cardboard first. Shake aerosol cans for a full minute, or thin sprayer paint as the manufacturer directs. Hold the nozzle about 8 to 10 inches from the surface, which is the sweet spot for most products. Too close and the paint runs. Too far and it dries before landing, giving a rough, sandy texture.
SPRAY 2Sweep in Overlapping Passes
Start spraying just before the panel edge and release just after it. Move in a steady horizontal sweep, overlapping each pass by about half. Do not stop in the middle of a pass, since pausing deposits too much paint and causes drips. Keep the nozzle parallel to the surface rather than tilting it, and keep your wrist moving with your arm.
SPRAY 3Build Light Coats and Respect Recoat Windows
Aim for several light, almost dusty coats instead of one heavy one. The first coat should look slightly uneven, and that is fine. Each coat bonds to the one before it, and the surface evens out as layers build. Follow the can or sprayer label for recoat timing. Spraying again too soon can cause wrinkling, while waiting too long can lead to poor bonding in some products.
| Method | Finish quality | Speed | Cost | Learning curve |
|---|---|---|---|---|
| Brush and roller | Very good with foam rollers | Moderate | Low | Easy |
| Aerosol cans | Smooth and even | Fast | Medium to high per project | Easy to moderate |
| Paint sprayer | Closest to factory finish | Fast on big jobs | Higher upfront | Moderate |
Look at furniture-friendly spray paints and handheld sprayers.
8. Painting Popular IKEA Pieces: What to Know for Each
The steps stay the same, but each piece has quirks. Knowing them in advance prevents surprises. Here is how the most commonly painted IKEA furniture behaves.
| Piece | Typical surface | Tips |
|---|---|---|
| Billy bookcase | Paper foil or veneer on particleboard | Remove shelves, paint panels flat, watch the thin edges |
| Kallax shelving | Foil over particleboard, honeycomb interior | Fully assemble only if painting in place; spray is easiest |
| Malm dresser | Veneer or foil | Remove drawers and handles; paint fronts separately |
| Hemnes | Solid pine and stained or lacquered finishes | Easiest to refinish; sand lightly and prime |
| Ivar | Raw solid pine | Sand, use wood primer, very forgiving |
| Besta | Foil, melamine, or lacquered fronts | Paint doors separately and replace hardware |
| Lack tables | Hollow-core with foil or lacquer | Very light; keep coats thin and flat |
| Alex drawers | Lacquered or foil finishes | Mask metal runners and remove drawer fronts |
Bookcases and Shelving
Bookcases are the most popular IKEA painting project, and for good reason. They are big, simple, and make a dramatic difference. The biggest challenge is the sheer number of surfaces. Take out every shelf, paint them flat, and let them dry on pyramids or a drying rack. Paint the main frame while it is lying on its back or leaning at a safe angle, working on one side at a time.
Dressers and Drawers
For dressers, always remove the drawers and paint the fronts flat. Wipe off drawer runners and avoid getting paint on any moving parts. Edges around drawer fronts are where chips usually happen first, so give them an extra thin coat of topcoat for protection. Let the drawers cure completely before sliding them back in, since friction on tacky paint causes sticking.
Tables and Desks
Tabletops see the hardest wear, so they deserve the best finish. Use a high-quality enamel and at least two coats of water-based polyurethane. Avoid placing hot mugs or sliding objects across the surface during the cure period. A desk mat or coasters help preserve the finish long term.
If you are shuffling furniture around after the makeover, protect your floors too. Quality furniture sliders for hardwood floors make it easy to move a freshly painted piece without scraping the finish or the boards underneath.
Furniture sliders and felt pads make repositioning painted pieces painless.
9. Hardware, Drawers, Doors, and Details That Make It Look Custom
Painting the furniture is only half of the transformation. Hardware often decides whether a piece looks homemade or professional. The smallest upgrades can change the entire look.
Swap the Handles and Knobs
IKEA hardware is functional but plain. Replacing handles with brass pulls, matte black bars, or ceramic knobs instantly makes a painted piece look custom. Measure the existing hole spacing before you shop so the new hardware lines up without drilling. If you are using different spacing, fill old holes with wood filler, sand smooth, and re-prime before painting.
Painting Metal Hardware and Hinges
If you want to keep existing hardware, you can paint it with a metal-appropriate primer and spray paint. Clean it with degreaser, prime it, and paint in thin coats. Hang small pieces on wire to dry. Hinges and slides inside cabinets are best left alone or masked off, since paint can interfere with their movement.
Glass, Mirrors, and Plastic Components
Mask glass panels carefully with painter’s tape and a razor-cut edge. Plastic components are tricky because most paints do not bond well without special primer. When in doubt, leave plastic parts as they are, or replace them. Textured or embossed panels may need extra filling to hide the pattern, and are sometimes better left alone.
Tips for Crisp Edges and Clean Lines
- Press painter’s tape down firmly and seal the edge with a thin layer of clear coat before painting for sharp lines.
- Remove tape while the paint is slightly tacky, pulling at a low angle.
- Use a small angled brush for corners, then smooth with a roller.
- Paint the backs and undersides even if they are rarely seen, since moisture and humidity can affect unprotected surfaces.
Browse cabinet pulls and knobs to finish the transformation.
10. Colors and Finishes That Work Best on IKEA Furniture
Choosing a color is half the fun. The right shade can make a simple piece feel designer-made, while the wrong one can clash with the room. A few principles make the decision easier and keep you from repainting in a year.
Think About the Room First
Look at your walls, flooring, and other furniture. Do you want the piece to blend in or stand out? Soft neutrals like warm white, greige, and pale gray let furniture quietly support a room. Deep colors such as forest green, navy, and charcoal make a statement and add depth. Muted earthy tones like sage, terracotta, and clay are popular because they feel calm and warm at the same time.
Light and Dark Colors Behave Differently
Light colors can show dents and edges, while dark colors show dust and fingerprints. Dark colors also tend to highlight roller texture and brush marks, so they reward a careful hand or a spray finish. White and cream over a patterned foil may need an additional coat of primer to prevent the pattern from showing through.
| Color family | Mood | Practical note |
|---|---|---|
| Warm whites and creams | Bright, airy | May need extra primer coats over dark surfaces |
| Sage and soft green | Calm, natural | Forgiving and pairs with wood tones |
| Navy and deep blue | Classic, bold | Shows brush marks; spray or foam roller helps |
| Charcoal and black | Modern, dramatic | Shows dust and scratches more easily |
| Terracotta and clay | Warm, earthy | Hides wear well |
| Soft gray and greige | Neutral, flexible | Easy to match with most decor |
Finishing Touches: Stencils, Two-Tone, and Decorative Accents
A simple two-tone look, such as a colored frame with natural wood-tone shelves, gives the piece instant personality. You can also paint just the interior back panel in a bold shade to create a surprise pop of color. For decorative effects, use low-tack tape to create stripes or geometric blocks. Stick with one or two accents, so the piece reads as intentional rather than busy.
Once the piece is finished, think about how it fits the layout of the space. A freshly painted statement piece can change how you want to arrange everything around it, and our guide on how to arrange living room furniture is a handy next read.
Explore furniture paint colors and finishes for a custom look.
11. Common Mistakes and How to Fix Them
Even careful painters run into problems. The key is knowing what caused the issue and how to repair it without starting over. Most mistakes come down to rushing, thick coats, or skipping prep.
| Problem | Likely cause | How to fix it |
|---|---|---|
| Paint peels or scrapes off | Skipped cleaning, scuffing, or bonding primer | Remove loose paint, re-clean, scuff, prime, and repaint |
| Drips and sags | Coats too thick or too much paint on the roller | Let dry, sand smooth, and repaint with thin coats |
| Visible brush or roller marks | Wrong tools or overworking drying paint | Sand lightly and apply a final thin coat with a foam roller |
| Sticky or tacky surface | Humidity, thick coats, or insufficient cure time | Give it more time in a dry, warm room |
| Bubbles in the paint | Shaking instead of stirring or rolling too fast | Sand smooth and recoat, rolling slowly |
| Swollen edges | Too much moisture on particleboard | Sand, fill, and seal with primer; use less liquid next time |
| Wood pattern showing through | Not enough primer on textured foil | Add another thin coat of primer, then repaint |
| Chipped corners | Missing topcoat or early use | Touch up and add a protective topcoat |
The Three Biggest Mistakes
Rushing the cure. Furniture that feels dry can still be soft underneath. Loading a shelf with books after a day will leave rings and dents in the paint. Wait for the full cure period, even if it feels excessive.
Painting in poor conditions. Cold, damp, or very hot environments interfere with drying and adhesion. Choose a mild day or a temperature-controlled room whenever possible.
Using the wrong primer. Ordinary wall primer is the most common cause of peeling. If you remember only one thing from this guide, it should be to use a true bonding primer on laminate surfaces.
Do
- Test on a hidden spot first
- Use thin coats and long dry times
- Keep a wet edge while rolling
- Let the piece cure before heavy use
Don’t
- Skip the degreasing step
- Soak particleboard with water
- Sand through the surface layer
- Rush recoats on humid days
Wood filler and touch-up supplies keep repairs simple.
12. Care and Long-Term Durability of Painted IKEA Furniture
A well-painted piece can last for years, but only if you treat it with a little care, especially in the first month. Good habits protect your finish and keep it looking fresh.
The First 30 Days
During the cure period, treat the piece like a newborn. Do not stack heavy objects, tape anything to the surface, or use harsh cleaners. If you must place items on it, use a soft cloth or paper barrier. Keep the room at a stable temperature and avoid steamy environments. After about a month, most water-based finishes reach near full hardness.
Everyday Cleaning
Dust with a soft microfiber cloth. For spills and smudges, use a damp cloth with a drop of mild dish soap, then dry immediately. Avoid abrasive pads, ammonia-based cleaners, and heavy scrubbing. These can dull the sheen or lift the paint at the edges. Always wipe up liquids quickly, especially near seams and joints where particleboard is vulnerable.
Protecting the Finish
Use coasters, felt pads under objects, and placemats on desks and tables. Felt pads on the bottom of decor items keep them from scratching the surface. On painted surfaces, polish is not always the right answer, because some products leave a residue that can cloud the sheen. If your piece includes real wood elements that are sealed rather than painted, our guide to the best furniture polish can help you choose a product that works safely.
Pets, Kids, and High-Traffic Homes
Homes with pets and children are harder on finishes. Satin or semi-gloss paint with a durable topcoat is easier to wipe clean and resists scuffs. For cats in particular, scratching is a risk to any furniture edge or corner. A scratching post placed nearby and some deterrent tactics can protect your hard work. Our article on how to stop cats from scratching furniture has practical solutions.
Touch-Ups and Refreshing
Save a small jar of your leftover paint, labeled with the color name and date. A small chip can be touched up with a fine brush after a quick scuff and clean. If the entire surface starts to look tired years later, a light sanding and fresh topcoat can bring it back to life without redoing everything.
Felt pads, coasters, and microfiber cloths protect your painted finish.
Frequently Asked Questions About Painting IKEA Furniture
Can you paint IKEA furniture without sanding?
You can sometimes skip heavy sanding by using a high-quality bonding primer, but a light scuff is still strongly recommended. Scuffing gives the primer a texture to grip, and it makes a noticeable difference in long-term durability, especially on drawers and tabletops.
What kind of paint works best on IKEA laminate furniture?
Acrylic enamel and dedicated cabinet paint are excellent choices because they cure hard and resist scuffs. Always pair them with a bonding primer made for glossy surfaces. Chalk-style paints work too, but they need a protective topcoat to hold up in daily use.
Do I need to prime IKEA furniture before painting?
Yes. Primer is the layer that actually bonds to the slick surface. Without it, paint tends to peel, scratch, or chip, even if it looks fine at first. A bonding primer is the single most important product in the whole project.
How many coats of paint does IKEA furniture need?
Most pieces need one or two coats of primer and two coats of paint. Dramatic color changes, such as going from dark to light, may need a third coat. Thin coats with proper drying time give better results than fewer thick ones.
How long does painted IKEA furniture take to cure?
It usually feels dry within hours, but full hardness can take several days to a few weeks depending on the product and conditions. Be gentle during that time and follow the instructions on your paint and topcoat labels.
Can I paint IKEA furniture with a spray paint?
Yes. Spray paint creates a smooth finish with no brush marks. Prep and prime the same way, hold the can 8 to 10 inches away, and apply several light coats. Work in a ventilated area and wear a respirator.
Is it safe to paint over the thin wood-look foil on IKEA pieces?
It is safe as long as you clean it, scuff it gently, and use a bonding primer. Foil is thin, so avoid aggressive sanding that could tear or cut through it. If the foil is peeling or bubbling, repair or remove the loose areas first.
Will painted IKEA furniture chip easily?
It can if prep is skipped or if the piece is used heavily before curing. With proper cleaning, a bonding primer, quality paint, and a protective topcoat, painted furniture holds up well. Edges and corners are the most vulnerable, so protect them with extra care.
Can I paint IKEA furniture that I use in a kitchen or bathroom?
You can, but moisture and grease make it harder. Use a durable semi-gloss enamel and a water-resistant topcoat, and seal edges well. Particleboard that gets wet can swell, so painting is not a substitute for keeping the piece dry.
What is the easiest IKEA furniture to paint?
Solid pine pieces are the easiest, since they accept primer and paint much like traditional wood furniture. Laminate and foil pieces are fully paintable too, but they require more careful prep and a true bonding primer.
Can I paint IKEA furniture while it is assembled?
You can, but disassembling gives much better results. Painting panels flat reduces drips and lets you reach every edge. If disassembly is not possible, mask hardware and work in small sections, keeping a wet edge as you go.
Do I need a topcoat on painted IKEA furniture?
It is not always required, but it is strongly recommended for tabletops, dresser tops, and any surface that is touched often. A clear water-based topcoat adds hardness and makes cleaning easier.
How do I remove paint if I make a mistake?
For small errors, let the paint dry, sand the area smooth, and repaint. For larger problems, sand back to the primer layer and reapply paint. Avoid chemical strippers on particleboard, since they can damage the core and the surface layer.
Conclusion: A Little Prep Makes a Big Difference
Painting IKEA furniture is one of the most rewarding home projects you can take on. It is affordable, it is flexible, and it gives you the freedom to create exactly the look you imagined. The difference between a finish that peels in a month and one that lasts for years almost always comes down to preparation. Clean the surface thoroughly, scuff it lightly, use a real bonding primer, apply thin coats, and give the paint time to cure.
Start with a smaller piece, such as a side table or a set of drawer fronts, if you are nervous. Once you see how well the process works, you will probably look at every other piece in your home with fresh eyes. Take your time, trust the steps, and enjoy watching a plain flat-pack piece become something that looks like it was made just for your space.
Gather your primer, paint, and tools and give your IKEA furniture a new life.
You May Also Like
Keep going with more guides from Furniture Tales.