
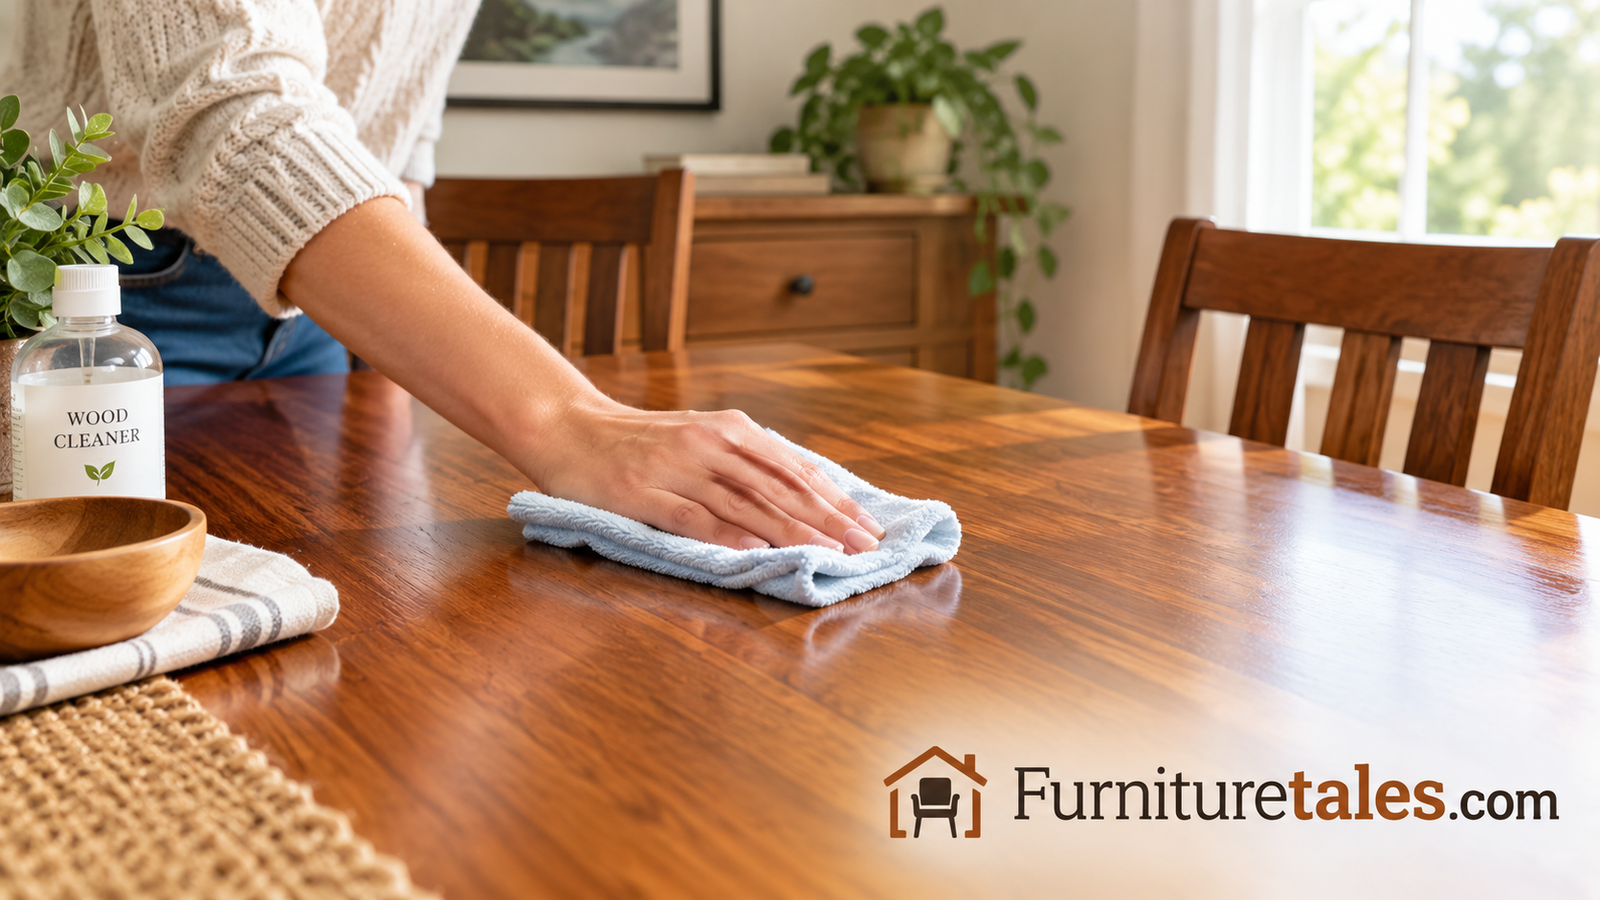
How to Clean Wood Furniture Without Damaging the Finish
A calm, step-by-step guide to removing dust, grime, sticky buildup, and stubborn marks while keeping your tables, dressers, and chairs looking warm and cared for.
The short version: dust first with a dry microfiber cloth, test any cleaner on a hidden spot, wipe with a barely damp cloth and a few drops of mild dish soap in warm water, always move with the grain, dry right away, and finish with a polish or wax that suits your finish. Everything below explains why each of those moves matters and what to do when the easy approach is not enough.
Why Cleaning Wood the Right Way Matters
Wood furniture is one of the few things in a home that can look better with age, but only if it is treated kindly along the way. A dining table that has hosted ten years of family dinners, a dresser that has held clothes through three moves, a desk covered in coffee-cup memories: these pieces collect a surprising amount of invisible film. Cooking vapor drifts out of the kitchen and settles as a thin, tacky layer. Hand oils darken armrests. Dust mixes with humidity and turns into a gray haze that makes even a rich walnut finish look tired.
The tricky part is that wood is not like tile or stainless steel. You cannot attack it with whatever spray happens to be under the sink. Most furniture is protected by a thin finish, such as lacquer, varnish, shellac, polyurethane, or wax, and that layer is what you are really cleaning. Strip it with harsh chemicals, soak it with water, or scrub it with something abrasive, and the damage is rarely subtle. You get cloudy patches, white rings, rough grain, peeling veneer, or a dull spot that never quite matches the rest of the piece.
The good news is that gentle cleaning works better than aggressive cleaning almost every time. Think of it the way you would think of washing a good wool sweater: less force, less moisture, the right product, and patience. Once you understand a few principles, cleaning wood furniture becomes a quick, almost relaxing routine rather than a stressful gamble.
What actually builds up on wood
Understanding the enemy makes the solution obvious. Four things typically coat wood furniture:
- Dust and airborne grit. Fine particles that scratch if you drag them around with a rough or dry-wiping motion.
- Grease and cooking film. Common on kitchen tables, sideboards, and anything within sight of a stovetop.
- Hand oils and skin residue. They darken chair arms, headboards, and drawer pulls.
- Product buildup. Layers of spray polish, especially silicone-based ones, that trap more dust and create a cloudy look over time.
Notice that most of these are removed with a light touch and a mild cleaner. Only the last one often needs a slightly different approach, and we will get to it. For now, the main lesson is this: the goal is to lift dirt without disturbing the finish underneath.
Cleaning as a form of inspection
One underrated benefit of cleaning wood regularly is that you notice problems early. A loose chair rung, a developing crack, a darkening patch near a window, or the faint powder of an insect issue are all easier to deal with when they are small. Running a cloth over every surface means you are also checking the piece, and a few minutes of attention can prevent a costly repair later.
The cost of getting it wrong
Replacing or refinishing a quality piece is expensive and time-consuming. Even simple refinishing involves stripping, sanding, staining, and sealing, and anyone who has done it will tell you it eats an entire weekend. If you ever end up there, our guide on how to paint furniture walks through the prep work for a fresh look. But it is far cheaper and easier to avoid the situation by cleaning properly in the first place.
Start with the right cloth
A good set of microfiber cloths is the single most useful upgrade to a wood-cleaning routine.
Know Your Finish Before You Clean
Before you reach for a single bottle, figure out what kind of surface you are dealing with. The finish determines what is safe. Two tables that look identical from across the room can behave completely differently when a damp cloth touches them.
The easy finish identification tests
You do not need laboratory equipment. Try these in an inconspicuous area, such as the underside of a tabletop or the back of a leg:
- The water drop test. Place a single drop of water on the surface. If it beads up and sits there, the finish is sealed, which is the most common case with modern varnish, polyurethane, or lacquer. If it soaks in and darkens the wood within a minute, the wood is likely unfinished, oiled, or has a worn finish.
- The fingernail test. Gently press a fingernail into an out-of-sight spot. A hard, glassy finish will not budge. A softer finish, like wax, may show a slight impression or leave a waxy residue.
- The rub test. Rub a cotton swab dipped in a tiny amount of mineral spirits on a hidden area. If the finish stays intact, it is probably polyurethane or varnish. If it gets sticky or lifts, it may be shellac or lacquer, which are more delicate.
Common finishes at a glance
| Finish | How it looks and feels | Cleaning approach |
|---|---|---|
| Polyurethane / varnish | Hard, glossy or satin, water beads on top | Mild soap solution, barely damp cloth, dry immediately |
| Lacquer | Smooth and thin, common on mid-century and older factory pieces | Dry dusting, very light damp wipe, avoid alcohol and ammonia |
| Shellac | Warm amber glow, often on antiques | Dust only, tiny amount of water, never alcohol-based cleaners |
| Wax | Soft sheen, slightly waxy to the touch | Dry or nearly dry cloth, re-wax occasionally |
| Oil finish (Danish, tung, teak) | Natural, matte, wood grain visible and slightly soft | Light cleaning, then re-oil when it looks dry |
| Paint | Opaque color, may chip at edges | Soft cloth, mild soap, gentle pressure |
| Unfinished | Rough, pale, absorbs water quickly | Dry brush or vacuum, very lightly damp cloth only if needed |
What if you cannot tell?
Treat it as the most delicate option. Dust it, then use the lightest possible damp wipe, and dry right away. If the piece is a valuable antique or a family heirloom, a short consultation with a furniture restorer is worth the money before you try anything more aggressive.
Quick note on veneer: Many dressers, desks, and cabinets are made of a thin wood veneer glued to a substrate. Veneer is more sensitive to moisture than solid wood because water can seep under the edges and lift the layer. Use even less water on veneer than you would on solid pieces.
Gentle cleaners built for finished wood
Look for pH-balanced formulas that clean without stripping the finish.
Supplies That Actually Help
You can clean wood furniture with a surprisingly short list of items. The temptation is to buy a different spray for every task, but a simple, well-chosen kit does most of the work. Here is what is worth having on hand.
The core kit
- Microfiber cloths (at least four). Dry ones for dusting, slightly damp ones for wiping, and clean dry ones for buffing. Microfiber traps dust instead of pushing it around, which is exactly what you want on a finished surface.
- A soft brush or soft-bristle paintbrush. Perfect for carvings, grooves, and the gaps around hardware where cloths cannot reach.
- A vacuum with a brush attachment. Useful for upholstered chair frames, slats, caning, and crevices.
- Mild dish soap. A couple of drops is plenty. Choose a clear, unscented soap without added degreasers or bleach alternatives.
- A spray bottle and a small bowl. A spray bottle gives you control over how much moisture touches the wood. A bowl is good for wringing out a cloth until it is barely damp.
- Cotton swabs and soft toothbrush. For detailing around knobs, carvings, and hinges.
Nice-to-have extras
- A pH-balanced wood cleaner. Handy for routine cleaning, particularly if you do not like mixing your own solution.
- A furniture polish or paste wax. The finishing touch that protects the surface and restores sheen. If you are shopping for one, our roundup of the best furniture polish covers what to look for and what to skip.
- Mineral spirits or a mild oil soap. For stickier buildup on sealed surfaces.
- Coasters and felt pads. Prevention is the easiest kind of cleaning.
- White vinegar and olive oil. Common kitchen items that some people use in diluted blends; we will talk about when they help and when they do not.
What to keep away from your wood
Safe bets
- Microfiber and soft cotton
- Mild dish soap in warm water
- Soft brushes
- Paste wax and quality polish
- Barely damp cloths
Risky choices
- Ammonia-based glass cleaners
- Bleach or abrasive powders
- Steel wool or scouring pads
- Soaking wet sponges
- All-purpose sprays with strong solvents
One more thing about spray polishes. Many aerosol products leave a silicone film that looks shiny at first but builds up and attracts more dust. If your furniture feels slightly slippery or looks hazy despite regular dusting, that film may be the culprit, and we will cover how to remove it later.
Build your wood-care kit
Soft brushes, cloths, and a quality polish make every future cleaning faster.
Dust Thoroughly Before Anything Gets Wet
Dusting is the step people rush, and it is also the step that protects your finish the most. If you spray a cleaner onto a dusty surface and start rubbing, you are essentially making a gritty paste and dragging it across the wood. Even a tabletop that looks spotless can hold tiny, hard particles that leave faint scratches when pressed under a damp cloth.
Start by clearing everything off the piece. Lamps, books, plants, and decorative bowls all need to go somewhere else so you can reach every inch. Pull drawers partway out if you want to wipe the top edges, and remove any loose cushions from chairs so you can see the frame.
Why dry dusting comes first
Dust is mostly tiny mineral grains, fibers, and skin particles. Some of these are hard enough to scratch lacquer or varnish if they are ground in under pressure. Removing them dry, with a soft cloth that holds them, means the later wet pass only has to deal with oils and film. It also keeps your cleaning solution fresh longer, because it is not turning gray after the first few wipes.
How to dust properly
- Fold a dry microfiber cloth into quarters so you have several clean faces to work with.
- Wipe in long, light strokes following the direction of the grain, starting at the top of the piece and working downward so falling dust does not land on cleaned areas.
- Refold the cloth as it picks up dust. A dirty cloth just redistributes grime.
- Use a soft brush for carvings, turned legs, and decorative moldings, then follow with the cloth or vacuum attachment to catch what the brush loosens.
- Run the vacuum brush attachment gently along drawer runners, chair slats, caning, and the junctions where legs meet frames.
Avoid feather dusters on wood furniture. They are fun to wave around, but they mostly toss dust into the air, and it lands again an hour later. If you have allergies, microfiber or a slightly damp cloth for the very last pass is the better choice.
Cat owners, take note: Fur and dander gather in upholstered seats and under tables, and scratching leaves its own marks on wooden legs. If that is a recurring problem in your home, our guide to how to stop cats from scratching furniture can save your finish before you ever have to clean it.
Soft dusting tools that do not scratch
Brushes and microfiber dusters reach carvings and crevices without harming the finish.
Spot-Test Your Cleaner in a Hidden Area
Every cleaning guide tells you to spot-test, and most people skip it. It takes about two minutes, and it can save you from a permanent mistake. Wood finishes vary wildly, and even products labeled safe for wood can interact badly with an older or unusual finish.
Choose a spot nobody will ever see: the underside of a tabletop, the inside of a leg, the back of a drawer front, or the bottom edge of a shelf. Apply a small amount of your cleaning solution on a cloth, wipe gently, and let the area dry completely. Then look at it in good light and run your hand over it.
Why this step saves so much heartache
Finishes age. A piece that is thirty years old may have a coating that has become brittle, yellowed, or thin in places, especially on tabletops and armrests where it has been rubbed for years. Different areas of the same table can even react differently. A two-minute test tells you whether the finish will tolerate the cleaner, and whether you should use less moisture than planned. If you inherited the piece or bought it secondhand, treat the test as mandatory, because you cannot be sure what is on the surface.
What to look for after the test
- Color on the cloth. A little dirt is fine. A tinted cloth suggests the stain or finish is lifting, and you should stop.
- Cloudy or dull patches. This often means the finish is reacting to moisture or a solvent.
- A tacky or soft feel. The finish may be partially dissolving.
- Raised grain or darkening. The wood may be absorbing water, which signals an unfinished or worn surface.
If any of those appear, switch to a more conservative approach. For fragile surfaces, dry cleaning with a soft cloth and a tiny amount of wax is often enough.
Everything you need to test safely
A small spray bottle and cotton swabs keep your test patches tidy and controlled.
Mix a Gentle Cleaning Solution
With a clean, dust-free surface and a successful test patch, you are ready to mix something that actually lifts grime. The aim is mild, not magical. You want a solution that loosens oils and residue without leaving a film behind or soaking into the wood.
The simple, safe base recipe
For most sealed wood furniture, this combination is the workhorse:
- One cup of warm (not hot) water
- Two or three drops of mild, clear dish soap
- A clean microfiber cloth, wrung out until it feels barely damp rather than wet
Stir gently so you do not create a mountain of suds. Foam leaves residue and requires extra wiping. If you want a spray bottle instead, mix the same ratio at larger volume, and lightly mist the cloth rather than the furniture. Spraying directly onto wood tends to put down too much moisture in one spot.
Other solutions people use
| Solution | Best for | Watch out for |
|---|---|---|
| Dish soap and warm water | Everyday cleaning of sealed finishes | Too much soap leaves film |
| Diluted oil soap | Heavier buildup on varnished pieces | Use sparingly; rinse with damp cloth |
| Water with a splash of white vinegar | Light grime on sealed, durable finishes | Avoid on delicate, waxed, or antique finishes; high acidity can dull |
| Mineral spirits | Sticky residue, wax buildup | Ventilation required; test first |
| Commercial wood cleaner | Convenience and consistency | Read labels; avoid silicone-heavy sprays |
A lot of home cleaning blogs push heavy vinegar and oil mixtures. They can work in a pinch, but the acidity in vinegar can dull some finishes, and oil on top of dirt can trap it. If you use vinegar at all, keep the ratio low and reserve it for hard, modern finishes.
A quick safety note: never combine different cleaning products. Mixing common household cleaners can create harmful fumes, and nothing in this process needs a stronger chemical than the ones listed above.
Mild soaps and ready-made solutions
Pick a gentle formula and keep it with your other cleaning supplies.
Wipe With the Grain, Section by Section
Now comes the actual cleaning. The technique matters more than the product. Wood has grain, which is the direction of its fibers, and the finish settles into those microscopic grooves. Wiping across the grain can push dirt into the lines and sometimes scuff the finish. Wiping along the grain lifts grime out and leaves an even look.
The technique
- Dip the cloth into your solution and wring it out thoroughly. If water drips when you squeeze, keep wringing.
- Work on a section about the size of a placemat, using firm but gentle pressure.
- Wipe in the direction of the grain. For tabletops, that usually means lengthwise. For drawer fronts, follow the lines you can see.
- Rinse the cloth often, or switch to a clean one when it looks gray.
- Follow immediately with a clean, barely damp cloth (just water) to pick up any soap residue.
- Move on to the next section, then the legs, rungs, and edges.
How much pressure is enough?
Think of the pressure you would use to wipe a window, not scrub a pan. Dirt on a finished surface is held by oils, and a damp, soapy cloth dissolves those oils with very little force. If you find yourself pushing hard, the better answer is more time, a second pass, or a slightly stronger solution, not more muscle. Hard scrubbing can burnish the finish and leave shiny or dull patches that are obvious in raking light.
Details and tight spots
Carved legs, chair spindles, and decorative trim hold dirt that a cloth alone will miss. Wrap a cloth around a butter knife, dip a soft toothbrush in the solution, or use a cotton swab to reach the crevices. Gentle, short motions are better than scrubbing. If a groove is truly packed with old wax or grime, take your time and let the solution soften it for a few seconds before wiping.
Hardware deserves attention too. Drawer pulls, knobs, and hinges collect hand oils, so a quick wipe with a soft cloth keeps them from transferring grime back to the wood. If the hardware is tarnished brass or iron, remove it if possible so cleaner does not touch the surrounding finish.
Kitchen tables and dining sets: these see the most grease and food residue. Do two passes with a lightly soapy cloth, but never let puddles sit. Edges and chair rails often need the most attention.
Soft brushes for carvings and tight spots
Gentle brushes and swabs reach where cloths cannot.
Dry Immediately and Completely
Moisture is the quiet villain of wood care. Even a tough-looking varnish is not truly waterproof over time. Water that lingers can seep through tiny cracks, cloud the finish, swell the grain, loosen joints, or cause veneer to lift at the edges. Drying right away is not optional; it is half of the cleaning job.
How to dry like a pro
- Use a second dry microfiber cloth or a soft cotton towel and glide it along the grain right behind the damp cloth.
- Check edges, joints, and the underside where water likes to hide.
- Run a fan or open a window if the room is humid, so the piece fully dries within a few minutes.
- Do not stack items back on top until the surface is completely dry to the touch.
If you spot a puddle you missed, blot it rather than rub. Rubbing moves the water around and can spread it under the finish.
Why lingering water is so damaging
Wood is made of tiny tubes that pull in moisture like a sponge. When water gets past the finish, even a little, the fibers swell, and when they dry they shrink again. Do that often enough and you get cloudy finishes, cracked varnish, loose joints, and warped panels. On glued veneer the water can dissolve the adhesive and cause bubbling. Drying in one smooth pass right after cleaning takes only a few extra seconds and prevents nearly all of these problems.
Humidity and the long game
Wood naturally expands and contracts with seasonal humidity, so keep furniture away from heating vents, radiators, and direct sunlight when possible. If you are rearranging after cleaning, take a moment to think about airflow and sun exposure, because both affect the finish over the long term. Pieces tucked beside a radiator or under a sunny window age faster than those in steady, shaded spots.
Super-absorbent drying towels
A plush, lint-free cloth pulls moisture off the surface fast.
Polish, Condition, or Wax to Protect the Finish
After a good cleaning, the surface is bare in the sense that it has no sheen-enhancing layer other than the finish itself. This is the moment to protect it. A thin coat of polish, wax, or oil fills tiny scratches, repels dust, and brings back depth in the color. But not every product suits every piece, so match the product to the finish.
Do you actually need to polish every time?
No. Many people over-polish. A sealed finish is already protected, so polish is mostly there for appearance and a little extra dust resistance. If you clean monthly, polishing every few months is plenty. Polish more often only on pieces in direct sun or those that feel dry. Too much product causes the hazy buildup we covered earlier and makes the next cleaning harder.
Choosing the right protective product
| Product | Best for | Pros | Cons |
|---|---|---|---|
| Paste wax | Antiques, oiled, or wax-finished pieces | Deep glow, long-lasting | Takes effort to buff; not for all finishes |
| Cream polish | Everyday sealed furniture | Easy, quick shine | Overuse can build up |
| Spray polish | Fast touch-ups | Convenient | Some contain silicone; can leave residue |
| Furniture oil | Dry, oiled, or teak pieces | Nourishes the wood | Can darken; not for sealed finishes |
| Conditioner | Older, dry, or thirsty wood | Revives dull surfaces | Needs patience and light application |
How to apply it
- Make sure the surface is completely dry and dust-free.
- Apply a small amount to a clean cloth, not directly onto the furniture.
- Work in thin layers along the grain. More product does not mean more protection.
- Let it sit as the label directs, usually a few minutes.
- Buff with a fresh cloth until the surface feels smooth, not greasy.
If you are choosing a product and want a thoughtful comparison, take a look at our best furniture polish guide, which breaks down formulas, scents, and finishes in detail. And if your piece is tired enough that cleaning does not bring it back, a fresh coat of finish or paint might be the right next move. Check out our walkthrough on how to paint IKEA furniture for laminate and veneer pieces that need a different approach.
Polishes, waxes, and conditioners
Protect that freshly cleaned finish with a quality product matched to your wood.
Fixing Stains, Water Rings, Grease, and Odors
Routine cleaning handles most of what life throws at a table or dresser. But every home eventually deals with something more stubborn: a white ring from a sweating glass, a sticky patch near the kitchen, a musty drawer, or a mark from a child with a crayon. Work from the gentlest fix to the strongest, and stop as soon as the problem is gone.
White water rings and heat marks
White rings usually mean moisture is trapped in the finish rather than the wood itself. Because they sit in the top layer, they often respond to gentle treatments.
- Start with a dry cloth and a tiny amount of paste wax or non-gel toothpaste. Rub gently with the grain, wipe clean, and buff. Light abrasion plus oils can disperse trapped moisture.
- Try a gentle warmth method. Some people place a clean cotton cloth over the ring and briefly touch it with a warm (never hot) hair dryer on low, keeping it moving. Heat can help moisture evaporate. Be careful, because too much heat will worsen the damage.
- For stubborn rings, a very fine finishing product or a professional refinish may be the right call.
Grease, sticky film, and kitchen buildup
Cooking vapor creates a tacky layer that regular wiping spreads around instead of removing. Use a slightly stronger soap solution, wipe in small sections, and follow with a clean damp cloth. If the film remains, dampen a cloth with a small amount of mineral spirits, wipe, and then wash lightly with soapy water. Always test first and ventilate the room.
Silicone polish buildup
If your table looks hazy and feels slippery, years of spray polish may be the cause. A cloth lightly dampened with mineral spirits often cuts through it. Follow with a mild soap wipe and a fresh, light polish designed for your finish.
Sticky residue, crayon, and marker
Remove sticker residue by softening it with a drop of cooking oil on a cloth, then wiping away. For crayon, gently scrape with a plastic card, then wipe with soapy water. Pen or marker on a sealed surface can sometimes be lifted with a barely damp cloth and mild soap. Avoid alcohol or acetone on finished wood, which can dissolve the finish.
Fingerprints, oily smudges, and darkened armrests
Hand oils darken wood slowly, which is why chair arms and desk edges often look dingier than the rest of a piece. A soapy damp cloth followed by a clean damp one usually brings back the original tone. If the finish itself has worn through and the wood underneath is stained, cleaning will not restore it; that is the point where a light touch-up or refinish makes sense. Keep a clean dry cloth nearby and give high-touch spots a quick wipe every week and they will rarely reach that stage.
Scratches and light surface wear
Minor surface scratches in a sealed finish often look worse when dirty. After cleaning, many fade noticeably. For fine scratches, a little paste wax in a matching tone can fill and disguise them. Deeper scratches that catch a fingernail need a touch-up marker, wax filler stick, or a professional repair. Avoid rubbing nuts or oils into scratches as a quick fix, since results are unpredictable and can leave dark patches.
Mold, mildew, and musty smells
Light surface mildew on sealed furniture can be wiped with a slightly damp cloth and mild soap, followed by thorough drying. For musty drawers and cabinets, empty them, wipe the interior, and let them air out with the drawers open in a dry, ventilated room. A small container of baking soda or activated charcoal inside a closed drawer can absorb lingering odors. If mold keeps returning or has penetrated the wood, consider a professional evaluation, since the cause is usually a moisture problem.
Pet and smoke odors
Odors cling to porous surfaces. Wipe sealed wood with a mild soap solution, dry well, and air the piece out in fresh air if possible. Unfinished wood absorbs odors more deeply and may need light sanding and re-sealing. Pets that scratch or chew wood benefit from deterrents and scratching alternatives, as covered in our guide on stopping cats from scratching furniture.
Know when to stop: deep gouges, peeling veneer, black stains from long-term water exposure, or structural looseness are repair jobs, not cleaning jobs. A restorer can usually fix them far more cheaply than a failed DIY attempt.
Stain and ring repair helpers
Wax, touch-up markers, and gentle restorers can rescue many surface blemishes.
Cleaning by Wood Type and Piece
Not every wooden object in your home needs the same routine. A solid oak dining table, a painted nightstand, and an outdoor teak bench all sit in the same category, but they live very different lives. Here is how to adapt the six steps to what you own.
Antique and vintage furniture
Older pieces often have shellac, wax, or thin lacquer finishes that react to moisture and solvents. Dust with a soft brush and microfiber, use the least moisture possible, and avoid soaking carved or veneered areas. A thin coat of quality paste wax once or twice a year is usually plenty. If a piece has historic or monetary value, consult a conservator before trying anything unusual.
Painted wood furniture
Painted surfaces tolerate a bit more water than shellac, but the paint can chip. Wipe gently with a mild soap solution, never scrub, and dry promptly. If the paint is flaking, you may want to repaint rather than clean aggressively. Our guide to how to paint furniture covers prep, primer, and sealing.
Unfinished or raw wood
Raw wood soaks up liquids, so avoid wet cleaning. Use a dry brush or vacuum, then a barely damp cloth only for spot cleaning. Consider sealing the piece with a food-safe or appropriate finish so future cleaning is easier.
Wood veneer and laminate-faced pieces
Veneer is a thin wood skin over a core, and laminate is a printed plastic surface. Both dislike heavy moisture around edges. Wipe in small sections, avoid pooling water, and dry immediately.
Outdoor and patio wood
Teak, cedar, and eucalyptus furniture can handle more water, but they still benefit from gentle cleaning. Use a soft brush, mild soap, and rinse with a gentle spray of water. Allow it to dry fully in the sun, and use a teak sealer or oil if you want to preserve the color.
Wood furniture with upholstery or cane
Use the vacuum brush on upholstered seats and caning first, then clean the wood frame separately. Keep cleaner away from fabric to avoid water marks. Cane should be wiped with a barely damp cloth and dried promptly because moisture can loosen or sag it.
Quick reference by piece
| Piece | Best cleaner | Moisture level | Finishing touch |
|---|---|---|---|
| Dining table | Mild soap solution | Barely damp | Cream polish |
| Antique cabinet | Dry dusting, tiny damp wipe | Minimal | Paste wax |
| Painted dresser | Mild soap, soft cloth | Barely damp | None or light wax |
| Outdoor teak | Soft brush and mild soap | Rinse allowed | Teak oil or sealer |
| Veneer desk | Mild soap, very little water | Very low | Light polish |
| Cane chair frame | Vacuum, damp wipe | Very low | None |
Buying with cleaning in mind
If you are shopping for new wooden furniture, think about maintenance before you fall in love with a look. A satin polyurethane finish hides fingerprints and wipes clean with minimal effort. A high-gloss piece looks dramatic but shows every smudge. Oiled and waxed surfaces feel wonderful but ask for regular upkeep. Solid wood can be refinished many times, while thin veneer usually cannot, so it is worth asking what the piece is made of and how it is finished before you buy. Choosing a durable finish for the rooms that see the most action, such as the kitchen, dining room, and kids’ spaces, makes every future cleaning faster.
It also helps to ask how the manufacturer recommends cleaning the piece. Many makers include a care card, and following it keeps any warranty intact. Keep it somewhere easy to find, or snap a photo and save it with your household notes.
Care products for every wood type
From teak oil to antique wax, choose what fits your piece.
Maintenance Schedule and Common Mistakes
The easiest way to keep wood beautiful is to make small habits routine. A quick weekly pass beats a heroic annual scrub every time. Here is a simple rhythm that fits most homes.
A realistic care schedule
| How often | What to do |
|---|---|
| Weekly | Dry-dust all surfaces with microfiber; wipe up spills right away |
| Monthly | Damp-wipe high-touch pieces such as dining tables and chair arms; dry thoroughly |
| Every 3–4 months | Light polish or wax on pieces that see heavy use |
| Twice a year | Deep clean, check for scratches, tighten loose hardware, reposition pieces away from sun |
| As needed | Spot treat rings, sticky patches, and marks |
Habits that prevent damage
- Use coasters, trivets, and placemats under drinks, hot dishes, and plants.
- Add felt pads under lamps, decor, and chair legs. If heavy pieces slide around on hard floors, consider the options in our guide to the best furniture sliders for hardwood floors so you protect both the furniture and the floor.
- Keep wood out of direct sun, which fades and dries finishes.
- Maintain steady indoor humidity if you can.
- Wipe spills immediately; do not let liquids sit.
Mistakes to avoid
Common errors
- Soaking the wood with water
- Using abrasive pads or powders
- Spraying polish directly onto the piece
- Wiping across the grain
- Skipping the spot test
- Over-polishing until buildup forms
Better habits
- Barely damp cloths only
- Soft microfiber and brushes
- Apply product to the cloth first
- Follow the grain every time
- Test hidden spots first
- Use thin coats, buff well
One more tip: when you measure for a new piece or rearrange a room, plan for breathing space around furniture so cleaning is easy and air circulates. Leaving a few inches between furniture and walls makes dusting and vacuuming far easier and lets air move around the piece.
Protect wood with simple prevention
Coasters, felt pads, and trivets stop damage before it starts.
Frequently Asked Questions
What is the safest way to clean wood furniture?
Dust with a dry microfiber cloth, then wipe with a barely damp cloth using a few drops of mild dish soap in warm water. Always follow the grain and dry immediately. Test any new cleaner on a hidden spot first.
Can I use vinegar to clean wood furniture?
Diluted vinegar can work on hard, modern finishes, but its acidity may dull delicate or antique finishes. Use a weak mixture, test first, and avoid it on waxed, shellac, or oiled pieces. Mild dish soap is generally the safer choice.
How often should I clean wood furniture?
Dust weekly and damp-wipe heavily used pieces about once a month. Polish or wax every few months depending on use. Deep clean twice a year.
Is olive oil a good furniture polish?
It is not ideal. Cooking oils can turn sticky or rancid over time and attract dust. A purpose-made polish, wax, or furniture oil is a better long-term option.
How do I remove water rings from wood?
Start gently by rubbing the ring with a dry cloth and a bit of paste wax along the grain. Persistent rings may need professional help or refinishing.
Can I use baby wipes or disinfecting wipes on wood?
Occasional use on a sealed, durable finish is usually fine, but many wipes leave residue or contain ingredients that can dull finishes. A damp microfiber cloth is the safer routine option.
How do I clean sticky wood furniture?
Sticky surfaces often have grease or old polish buildup. Wipe with a mild soap solution, then use a cloth lightly dampened with mineral spirits if needed, testing first and ventilating the room.
How do I clean unfinished wood furniture?
Use a dry brush or vacuum, and a barely damp cloth only for spot cleaning. Raw wood absorbs moisture quickly, so keep water to a minimum and consider sealing it.
What is the best way to clean antique wood furniture?
Dust gently, use as little moisture as possible, and apply a thin coat of paste wax occasionally. For valuable antiques, consult a conservator before trying new products.
Does spray polish ruin wood?
Not necessarily, but some spray polishes contain silicone that builds up and attracts dust. Apply sparingly to a cloth rather than directly on the wood, and consider a quality cream or wax instead.
How do I get rid of musty smells in wooden drawers?
Empty the drawers, wipe the interior with a mild damp cloth, dry thoroughly, and let them air out. A bowl of baking soda or charcoal can absorb leftover odors.
Can I clean outdoor wood furniture with a hose?
Gentle rinsing is fine for many outdoor woods like teak, but avoid high-pressure sprays that can roughen the grain. Scrub with a soft brush and mild soap, rinse, and let it dry fully.
Final Thoughts
Cleaning wood furniture does not need to be intimidating. Once you know your finish, gather a few good supplies, and follow a simple sequence of dusting, testing, gentle washing, careful drying, and protecting, your pieces can look rich and cared for for decades. The secret is restraint: less water, less pressure, fewer harsh products, and a little consistency.
Start with one piece this weekend, perhaps the dining table or an end table that gets daily use, and notice how much brighter it looks after a proper clean. Then build a rhythm that fits your home. Your future self, and your furniture, will thank you.
Ready to give your wood furniture some love?
Grab quality cleaners, cloths, and polish and get started today.